Connect Xero to Fibula and send invoices automatically
Set up the Xero OAuth credential in Fibula, then forward supplier invoices and let them land in Xero as draft bills.
What you'll be able to do
Once Xero is connected, supplier invoices forwarded to your Fibula inbox land in Xero as draft bills. Vendor, amount, due date, and line items are already filled in. Your bookkeeper just opens Xero, reviews the draft, and clicks approve.
The wiring is the same shape every time: an Email Trigger feeds a Document Schema, and the Document Schema feeds Xero.
Before you start
You will need three things:
- A Fibula account. Sign in with Google to get going.
- A Xero account. Any plan works.
- One or two real supplier invoices to test with. PDFs or scans are fine.
Step 1. Create a Xero OAuth app
Xero apps live in the Xero Developer Portal. You create one app per integration, and Xero hands you a Client ID and Client Secret that Fibula uses to talk to your Xero organisation.
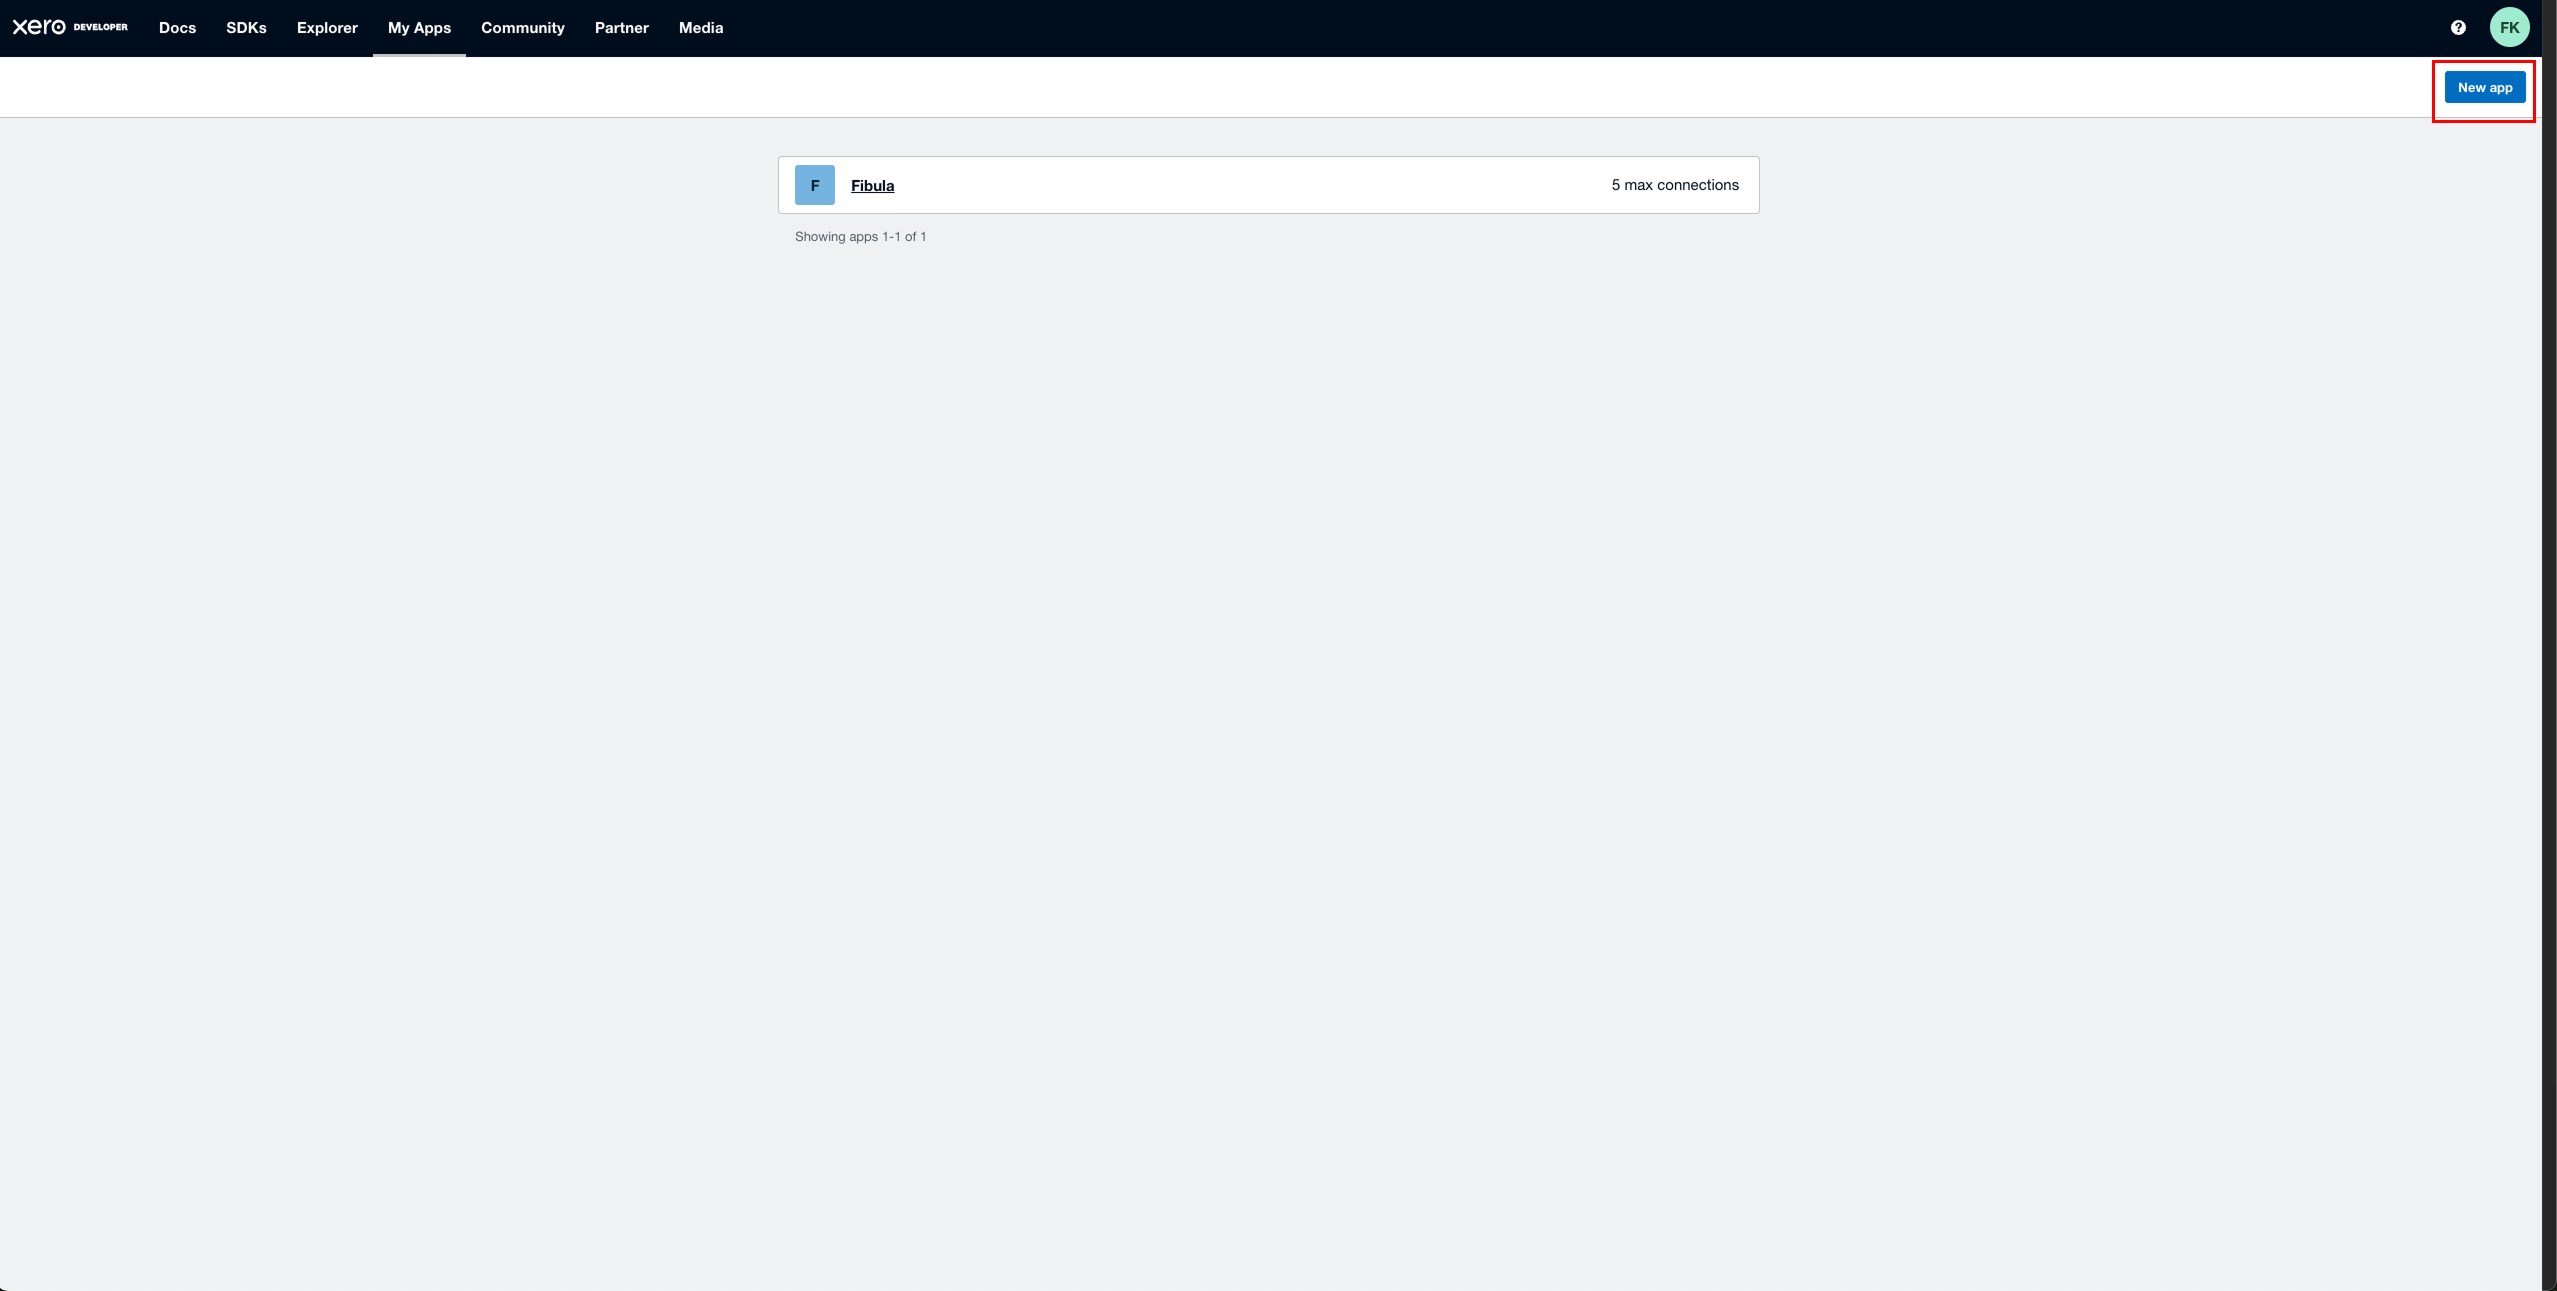
Open developer.xero.com/app/manage and sign in with your Xero account. Click New App in the top right.
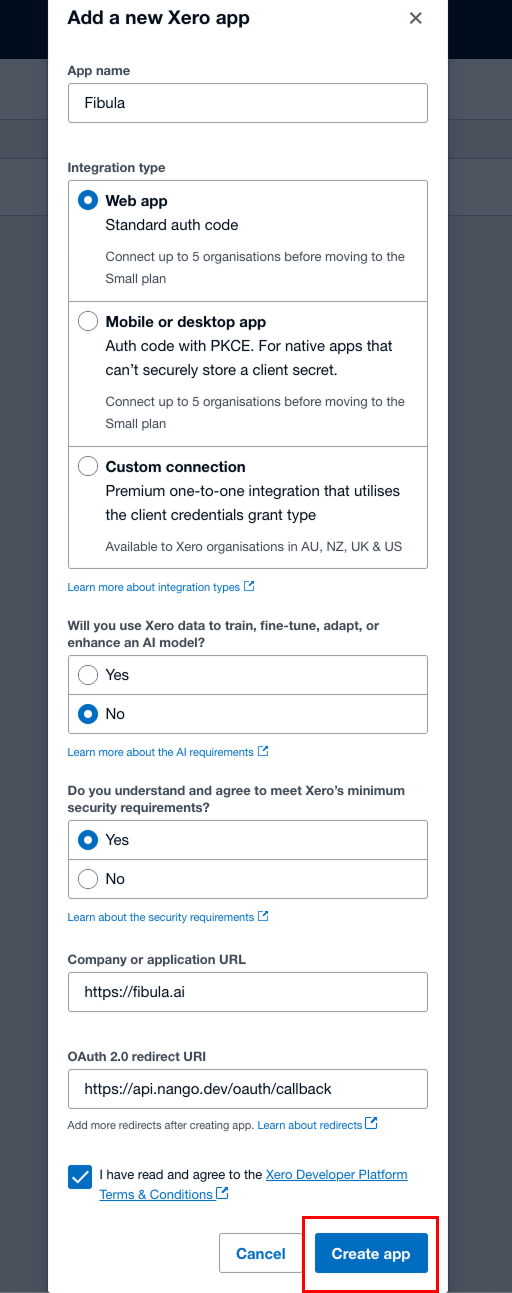
Fill in the app form. Use Fibula as the app name. Pick Web app as the integration type. Set your company URL. For the OAuth 2.0 redirect URI, copy the value Fibula shows in the New Credential screen (Step 2 below) or paste in https://api.nango.dev/oauth/callback. Accept the terms, then click Create App.
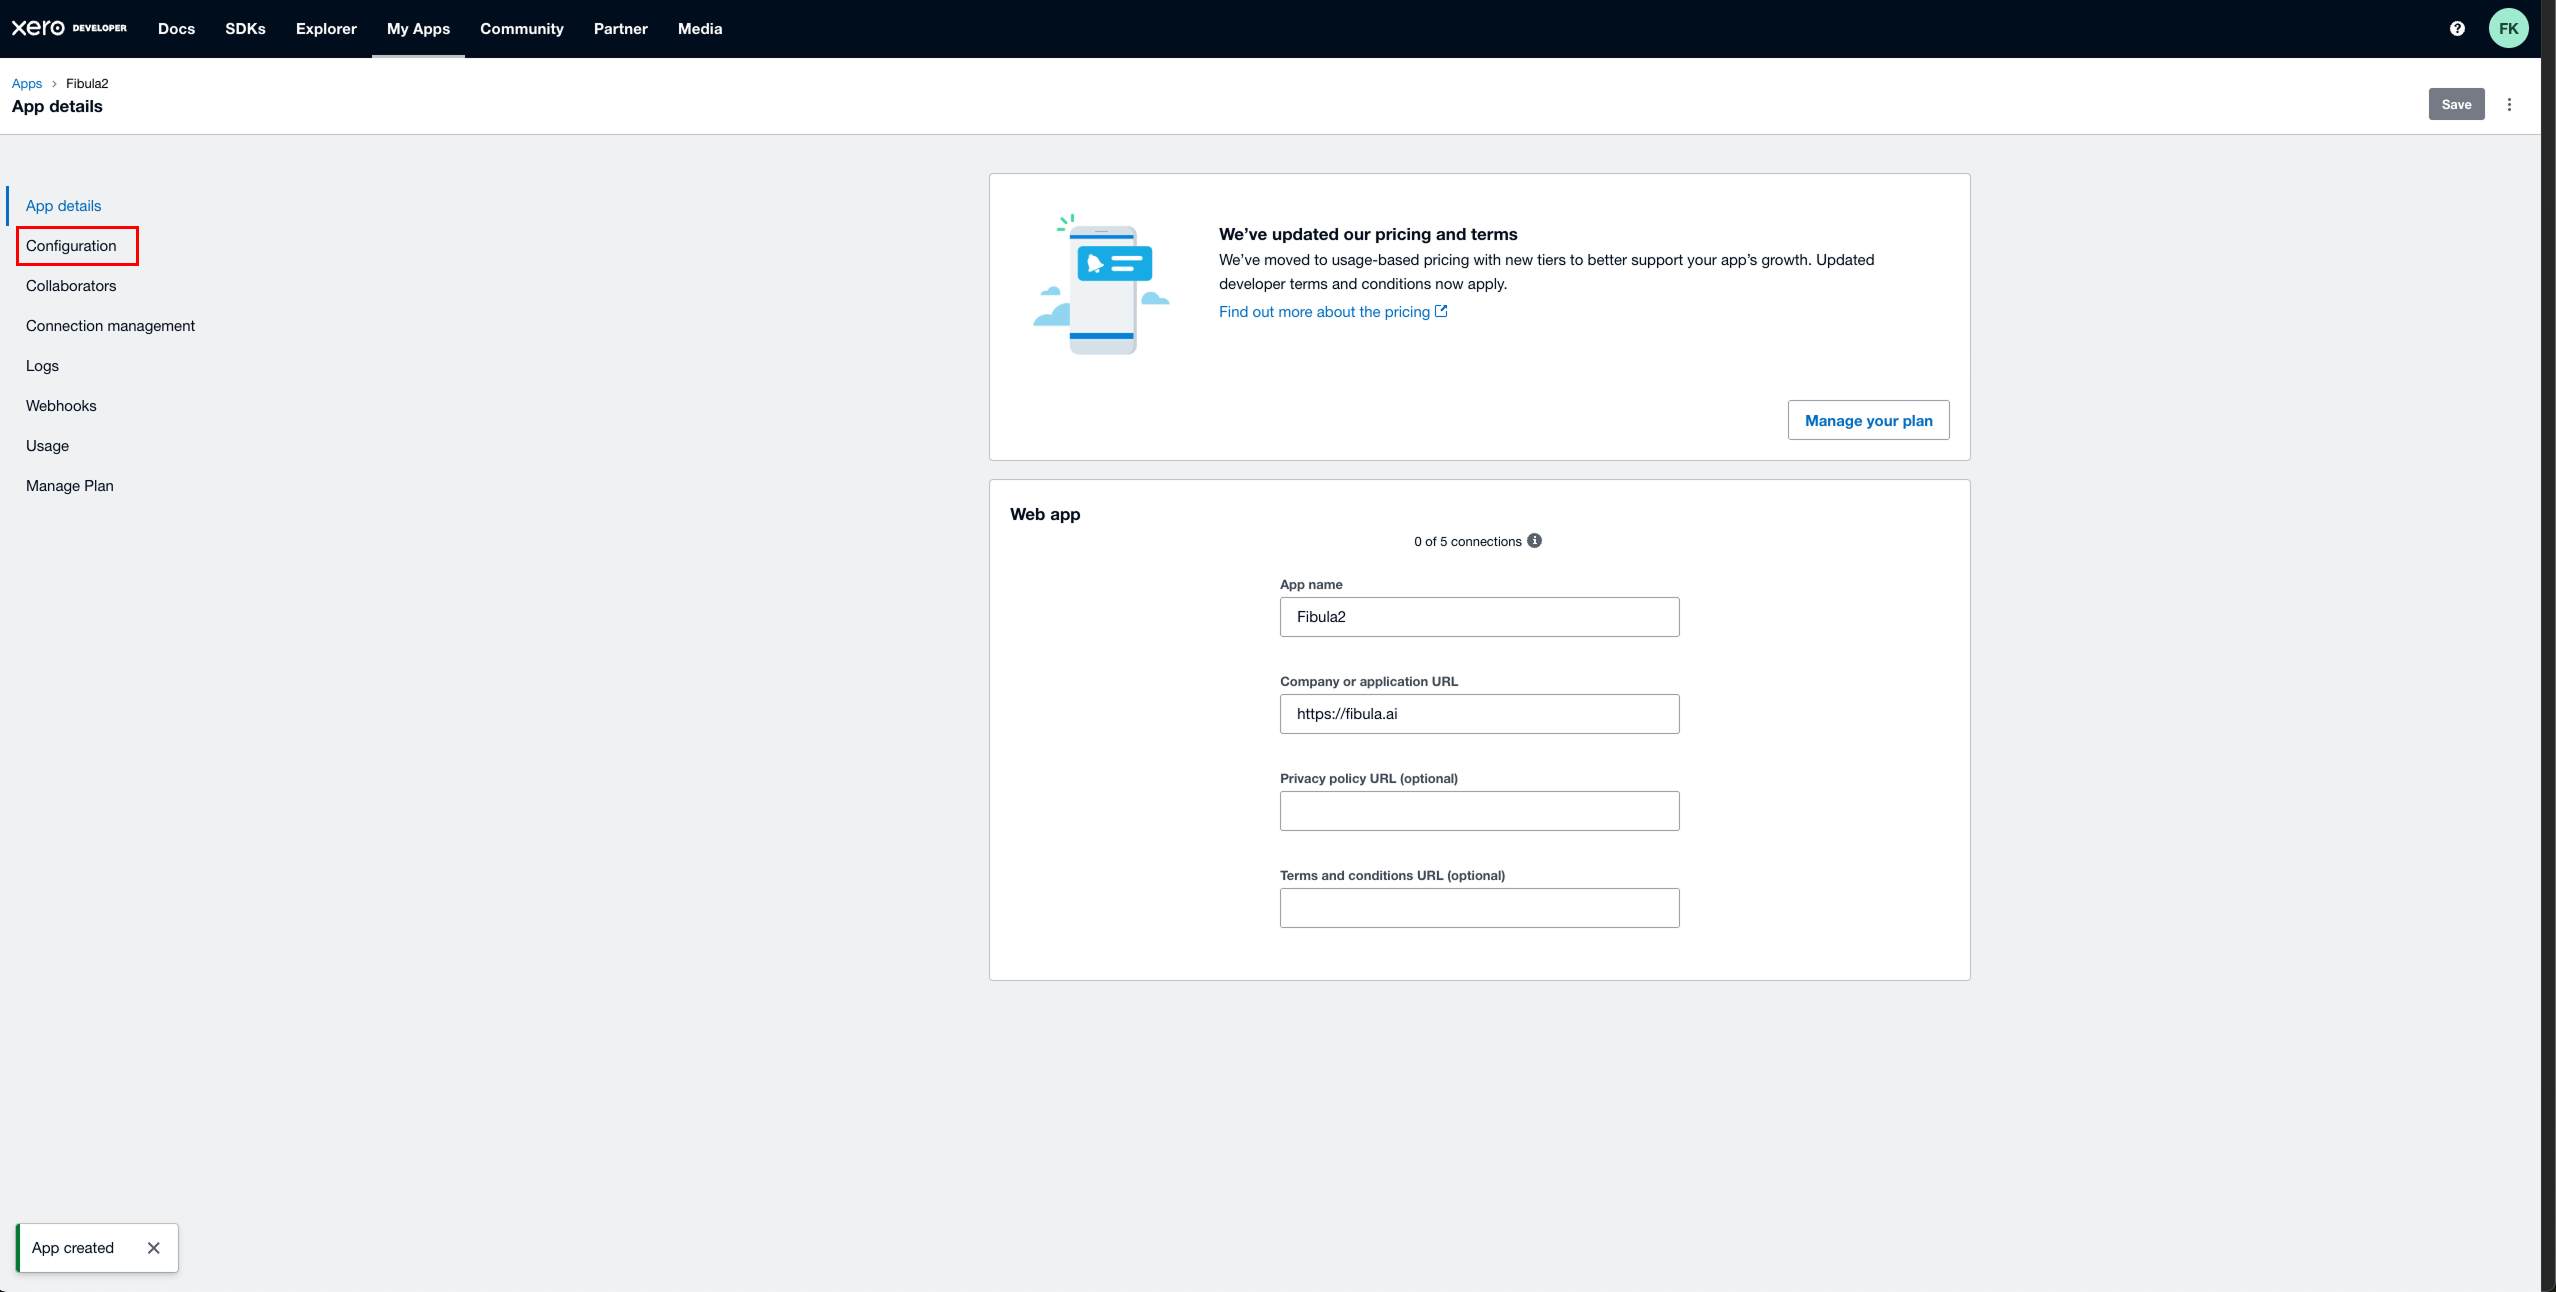
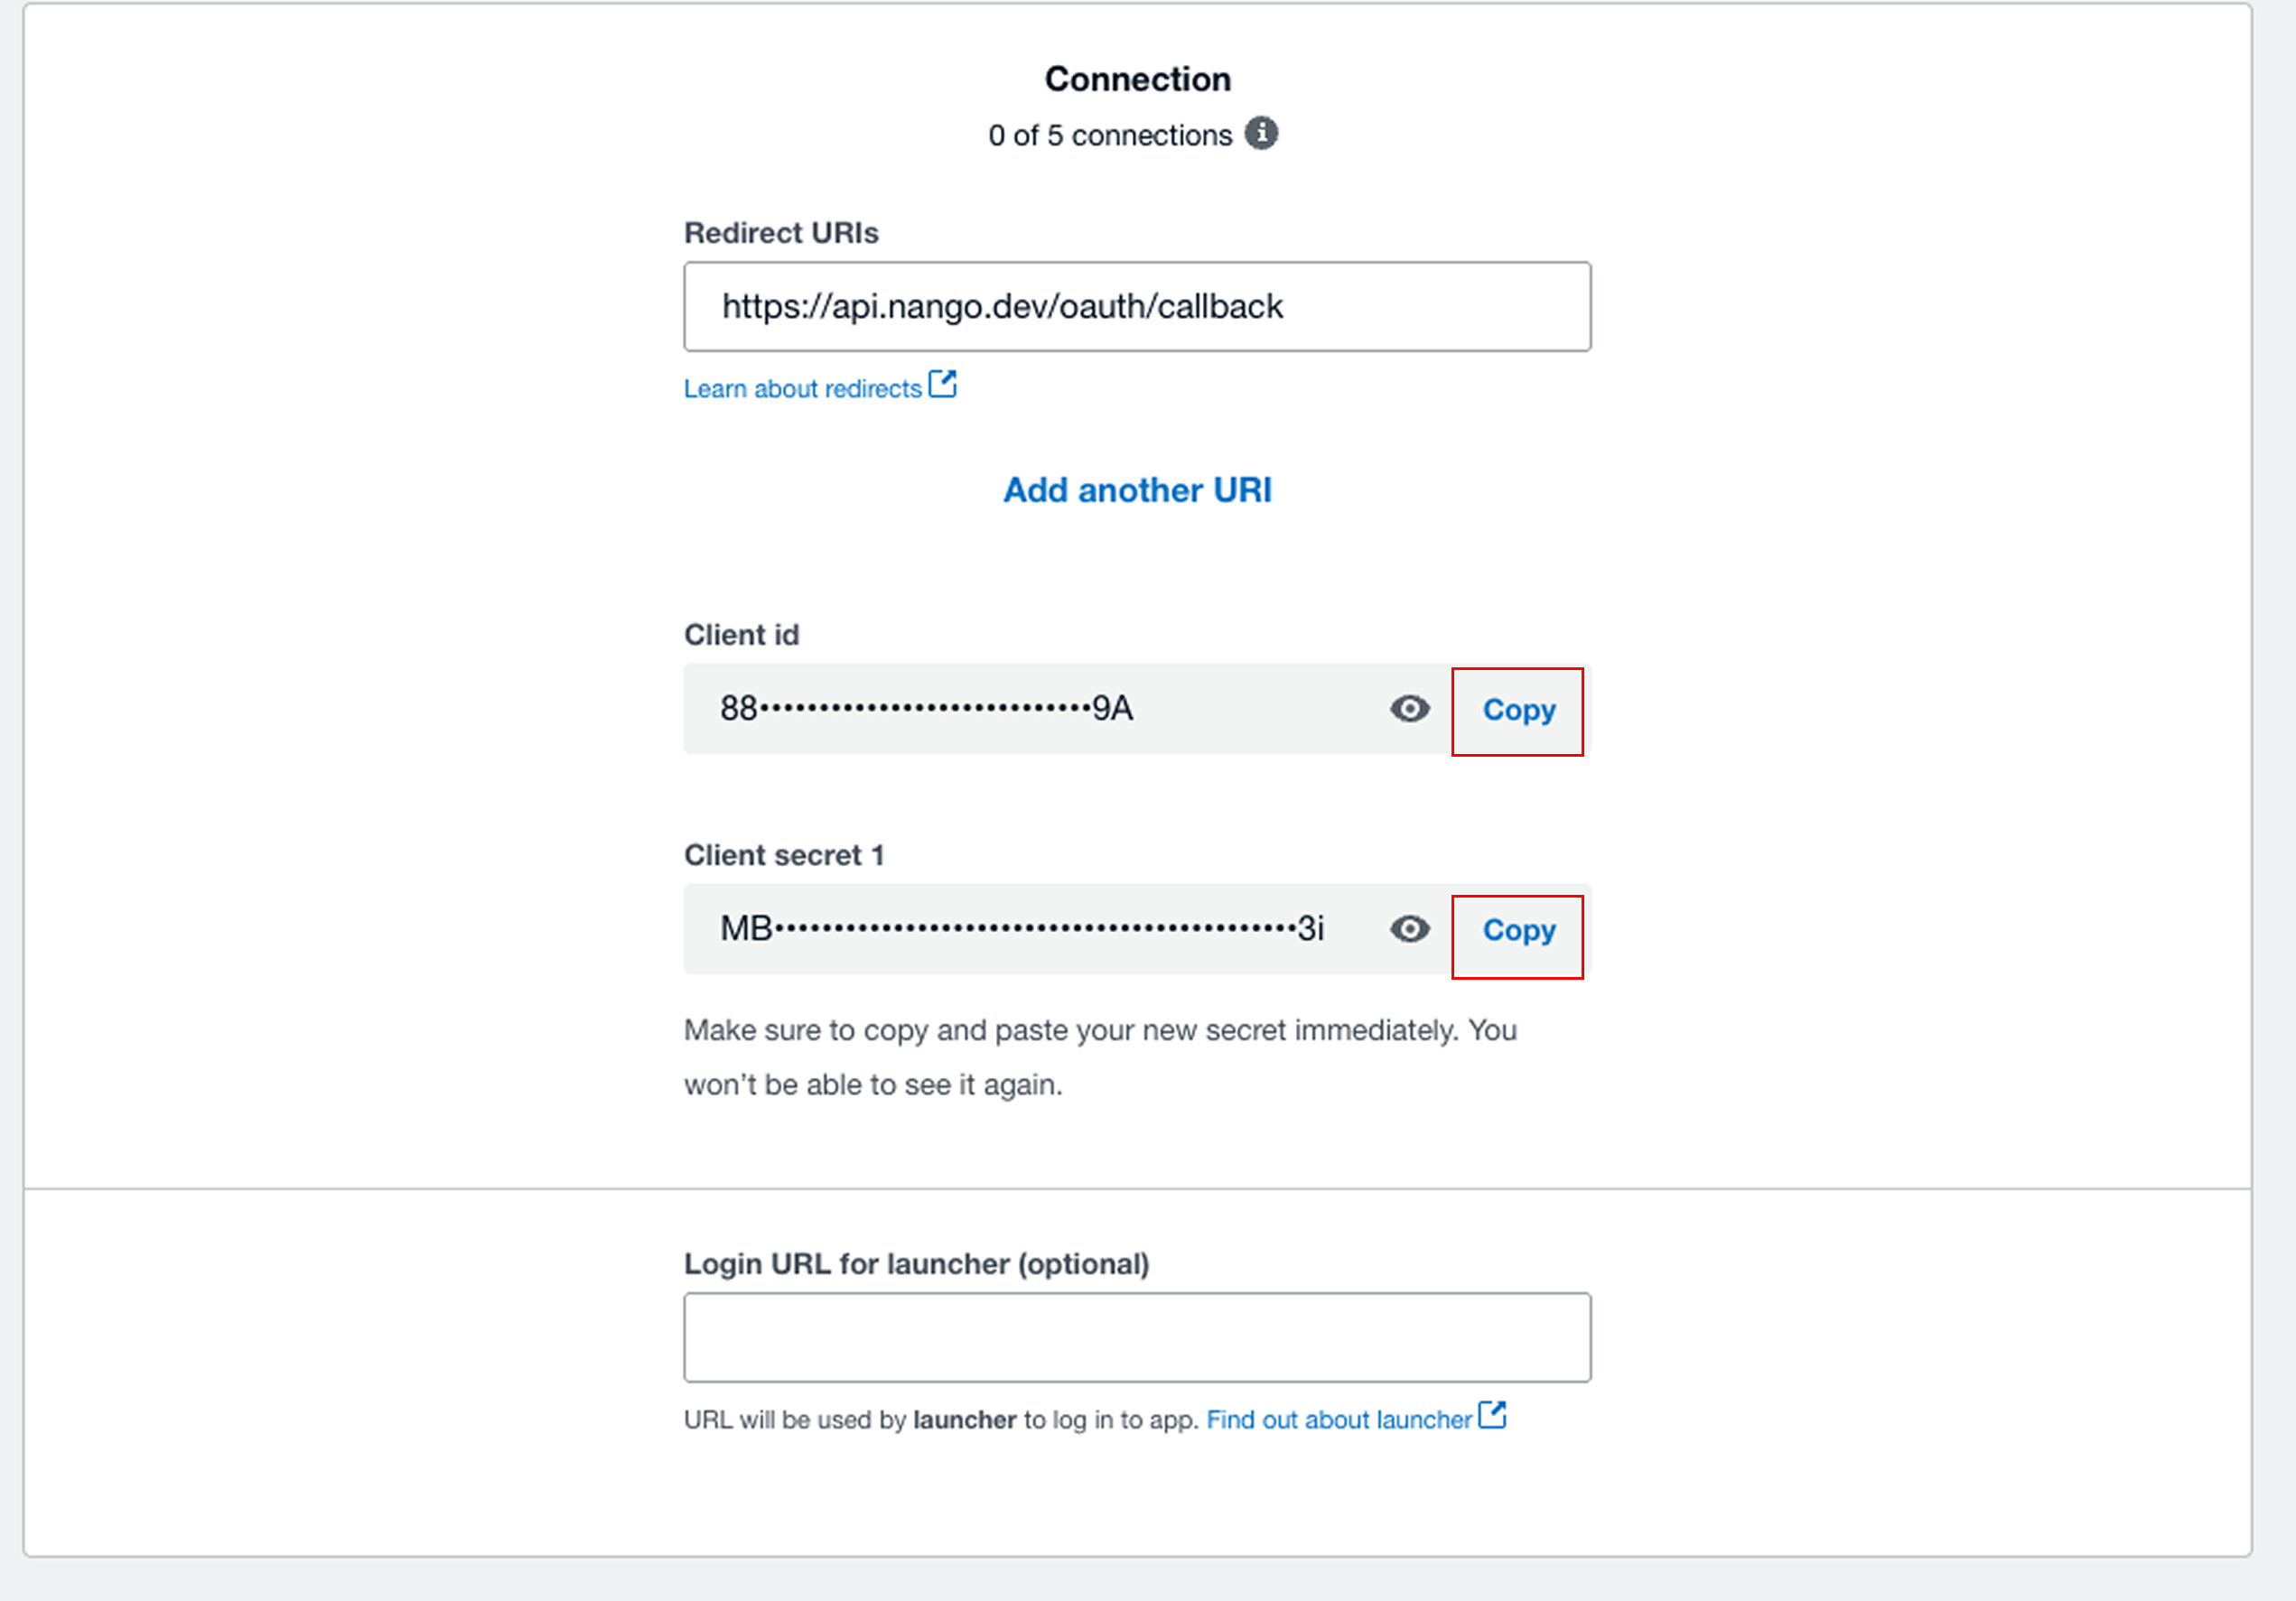
Once the app is created, open the Configuration tab in the left side nav. This is where Xero stores the Client ID and lets you generate a secret.
Click Generate a secret. Xero generates a one-time Client Secret for this app.
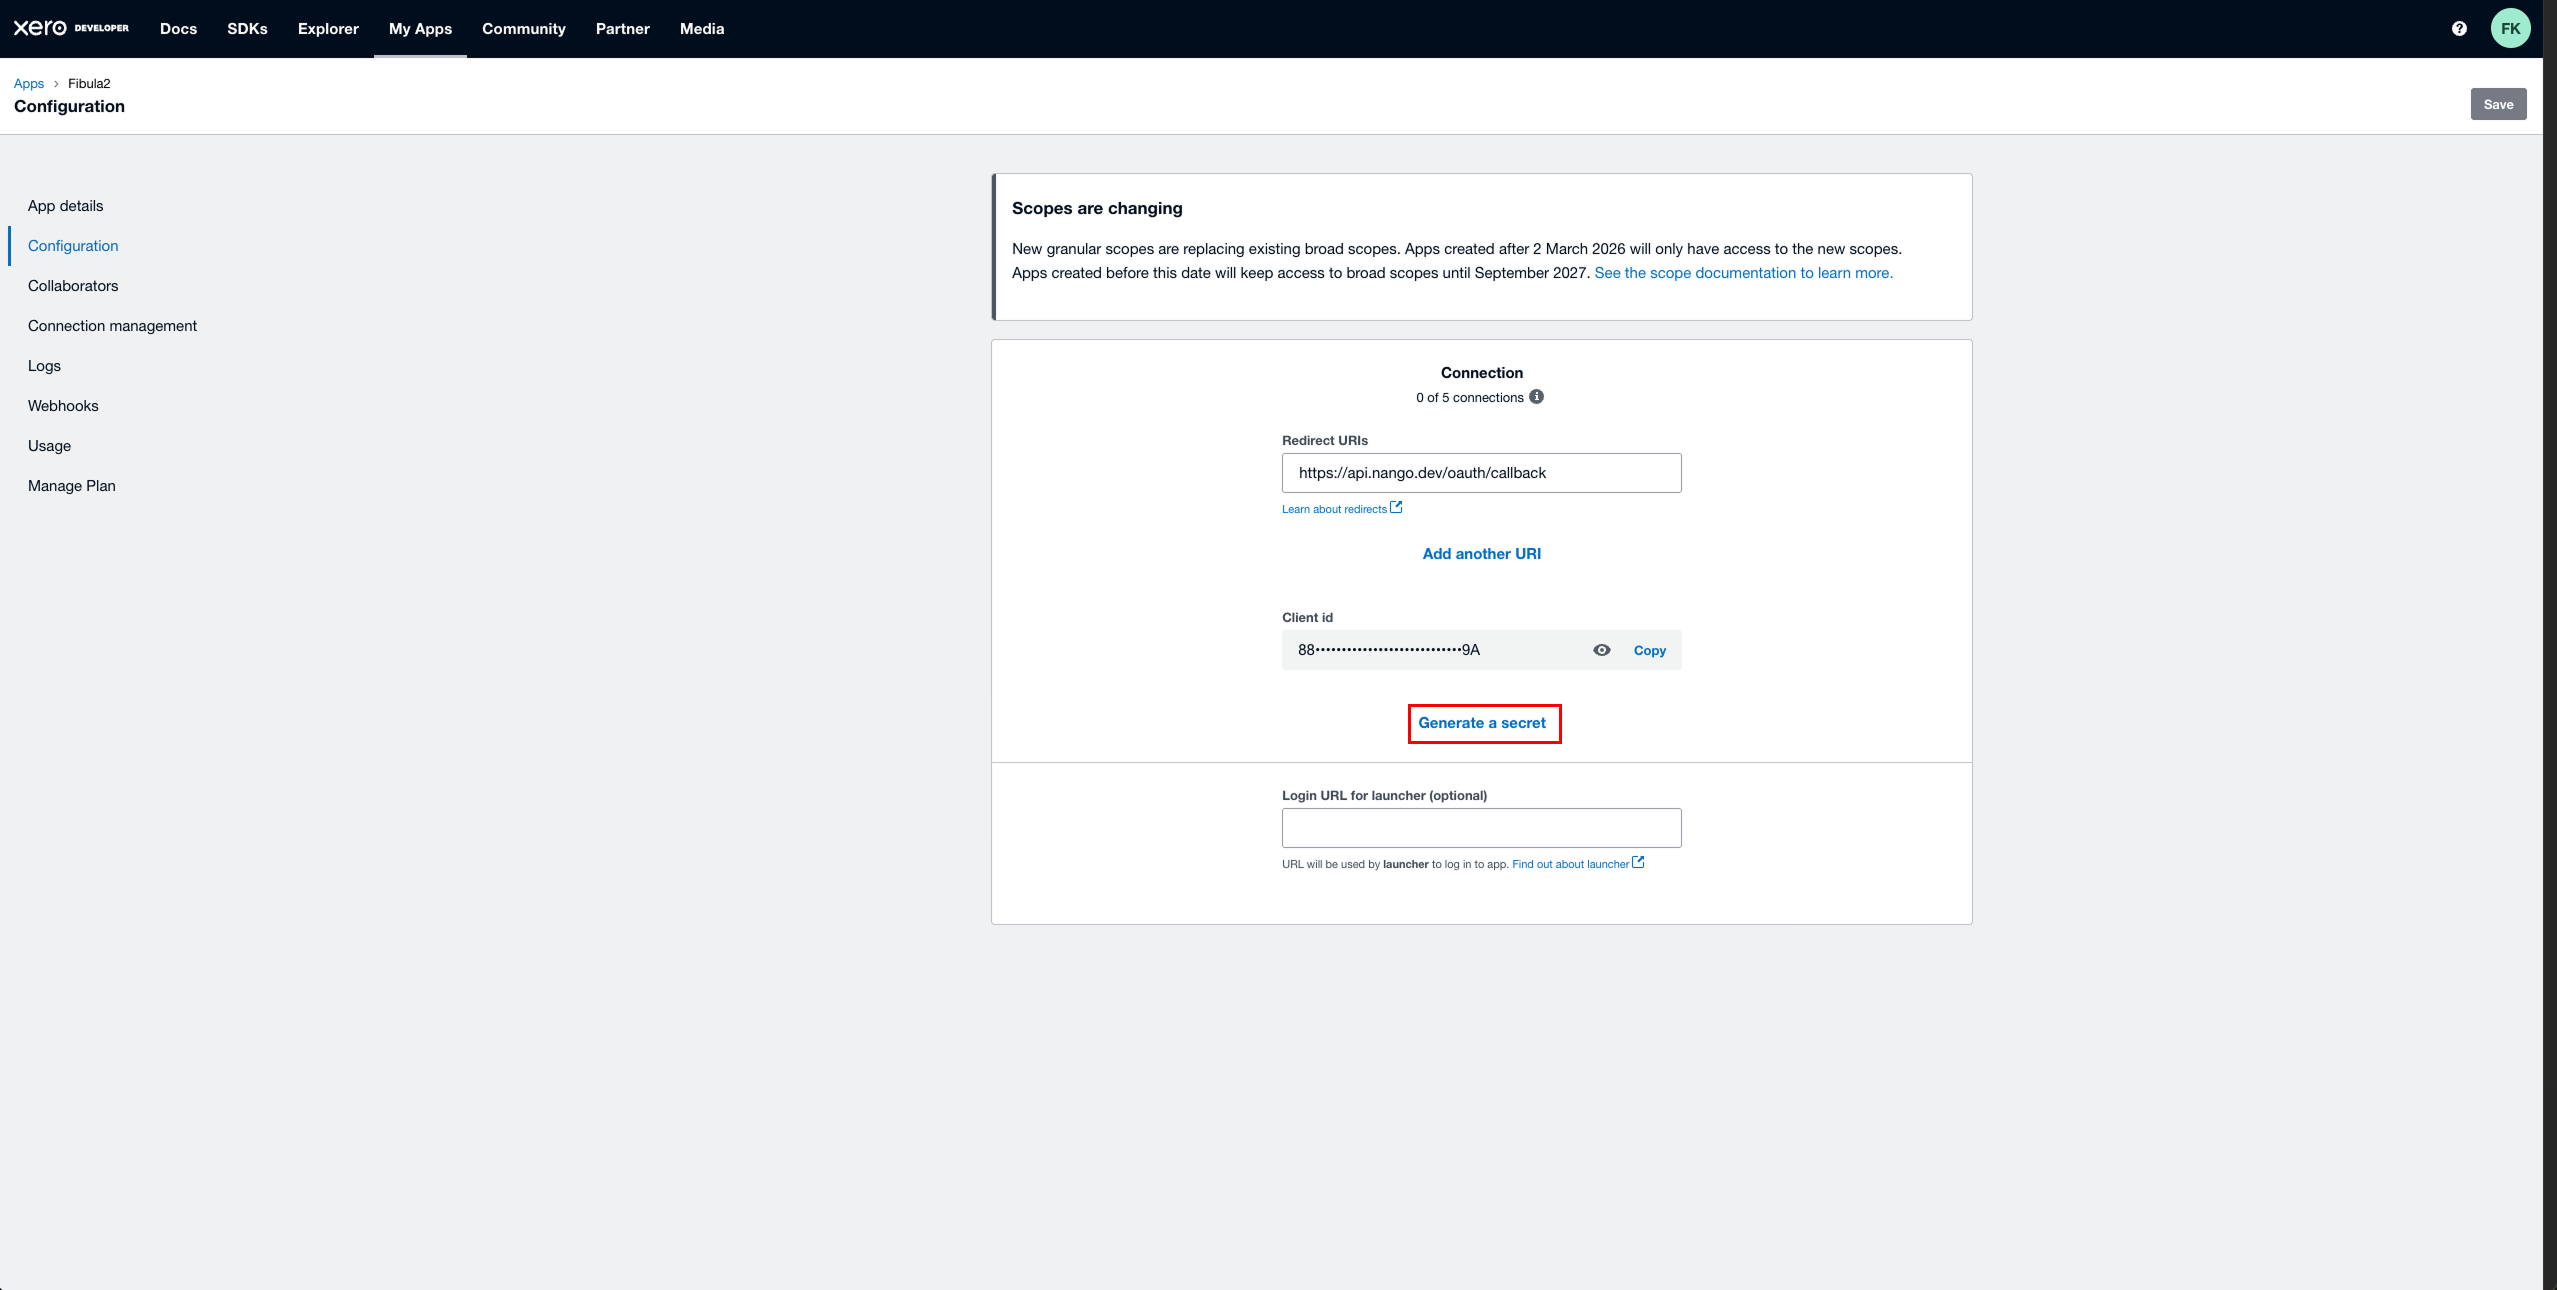
Copy the Client ID and the Client Secret. Keep them somewhere safe for the next step.
Step 2. Add the credential in Fibula
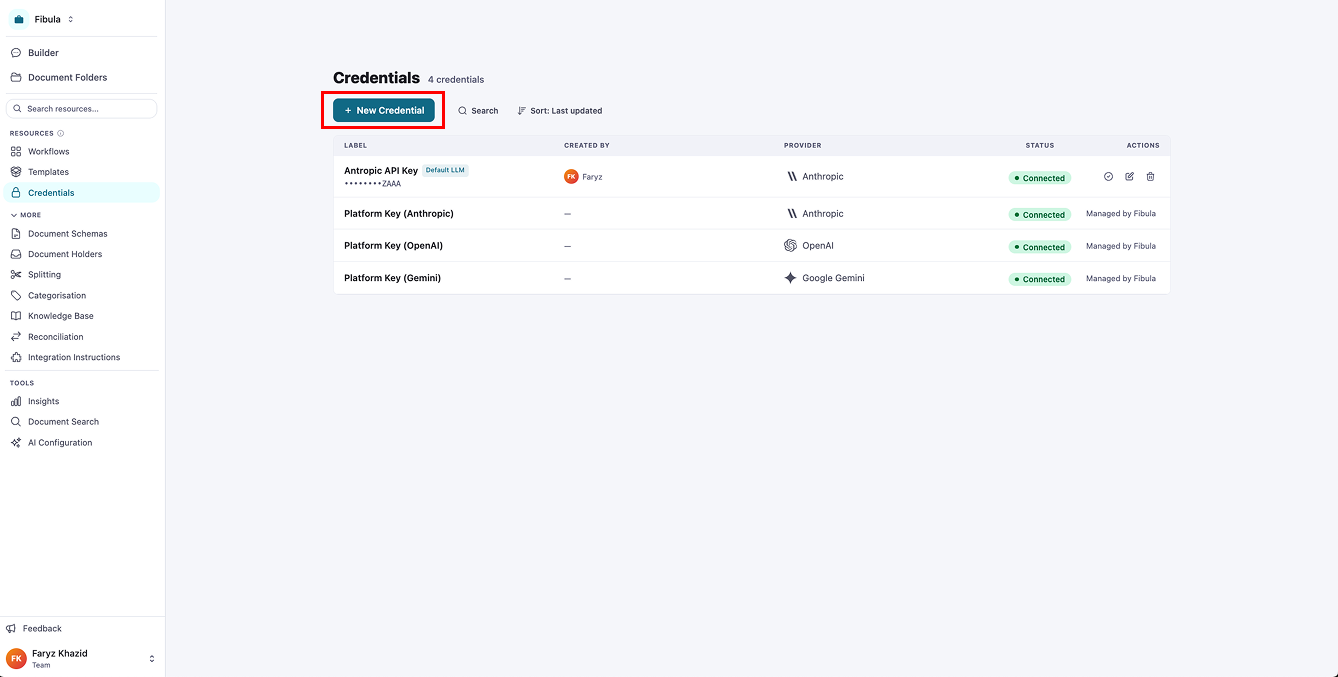
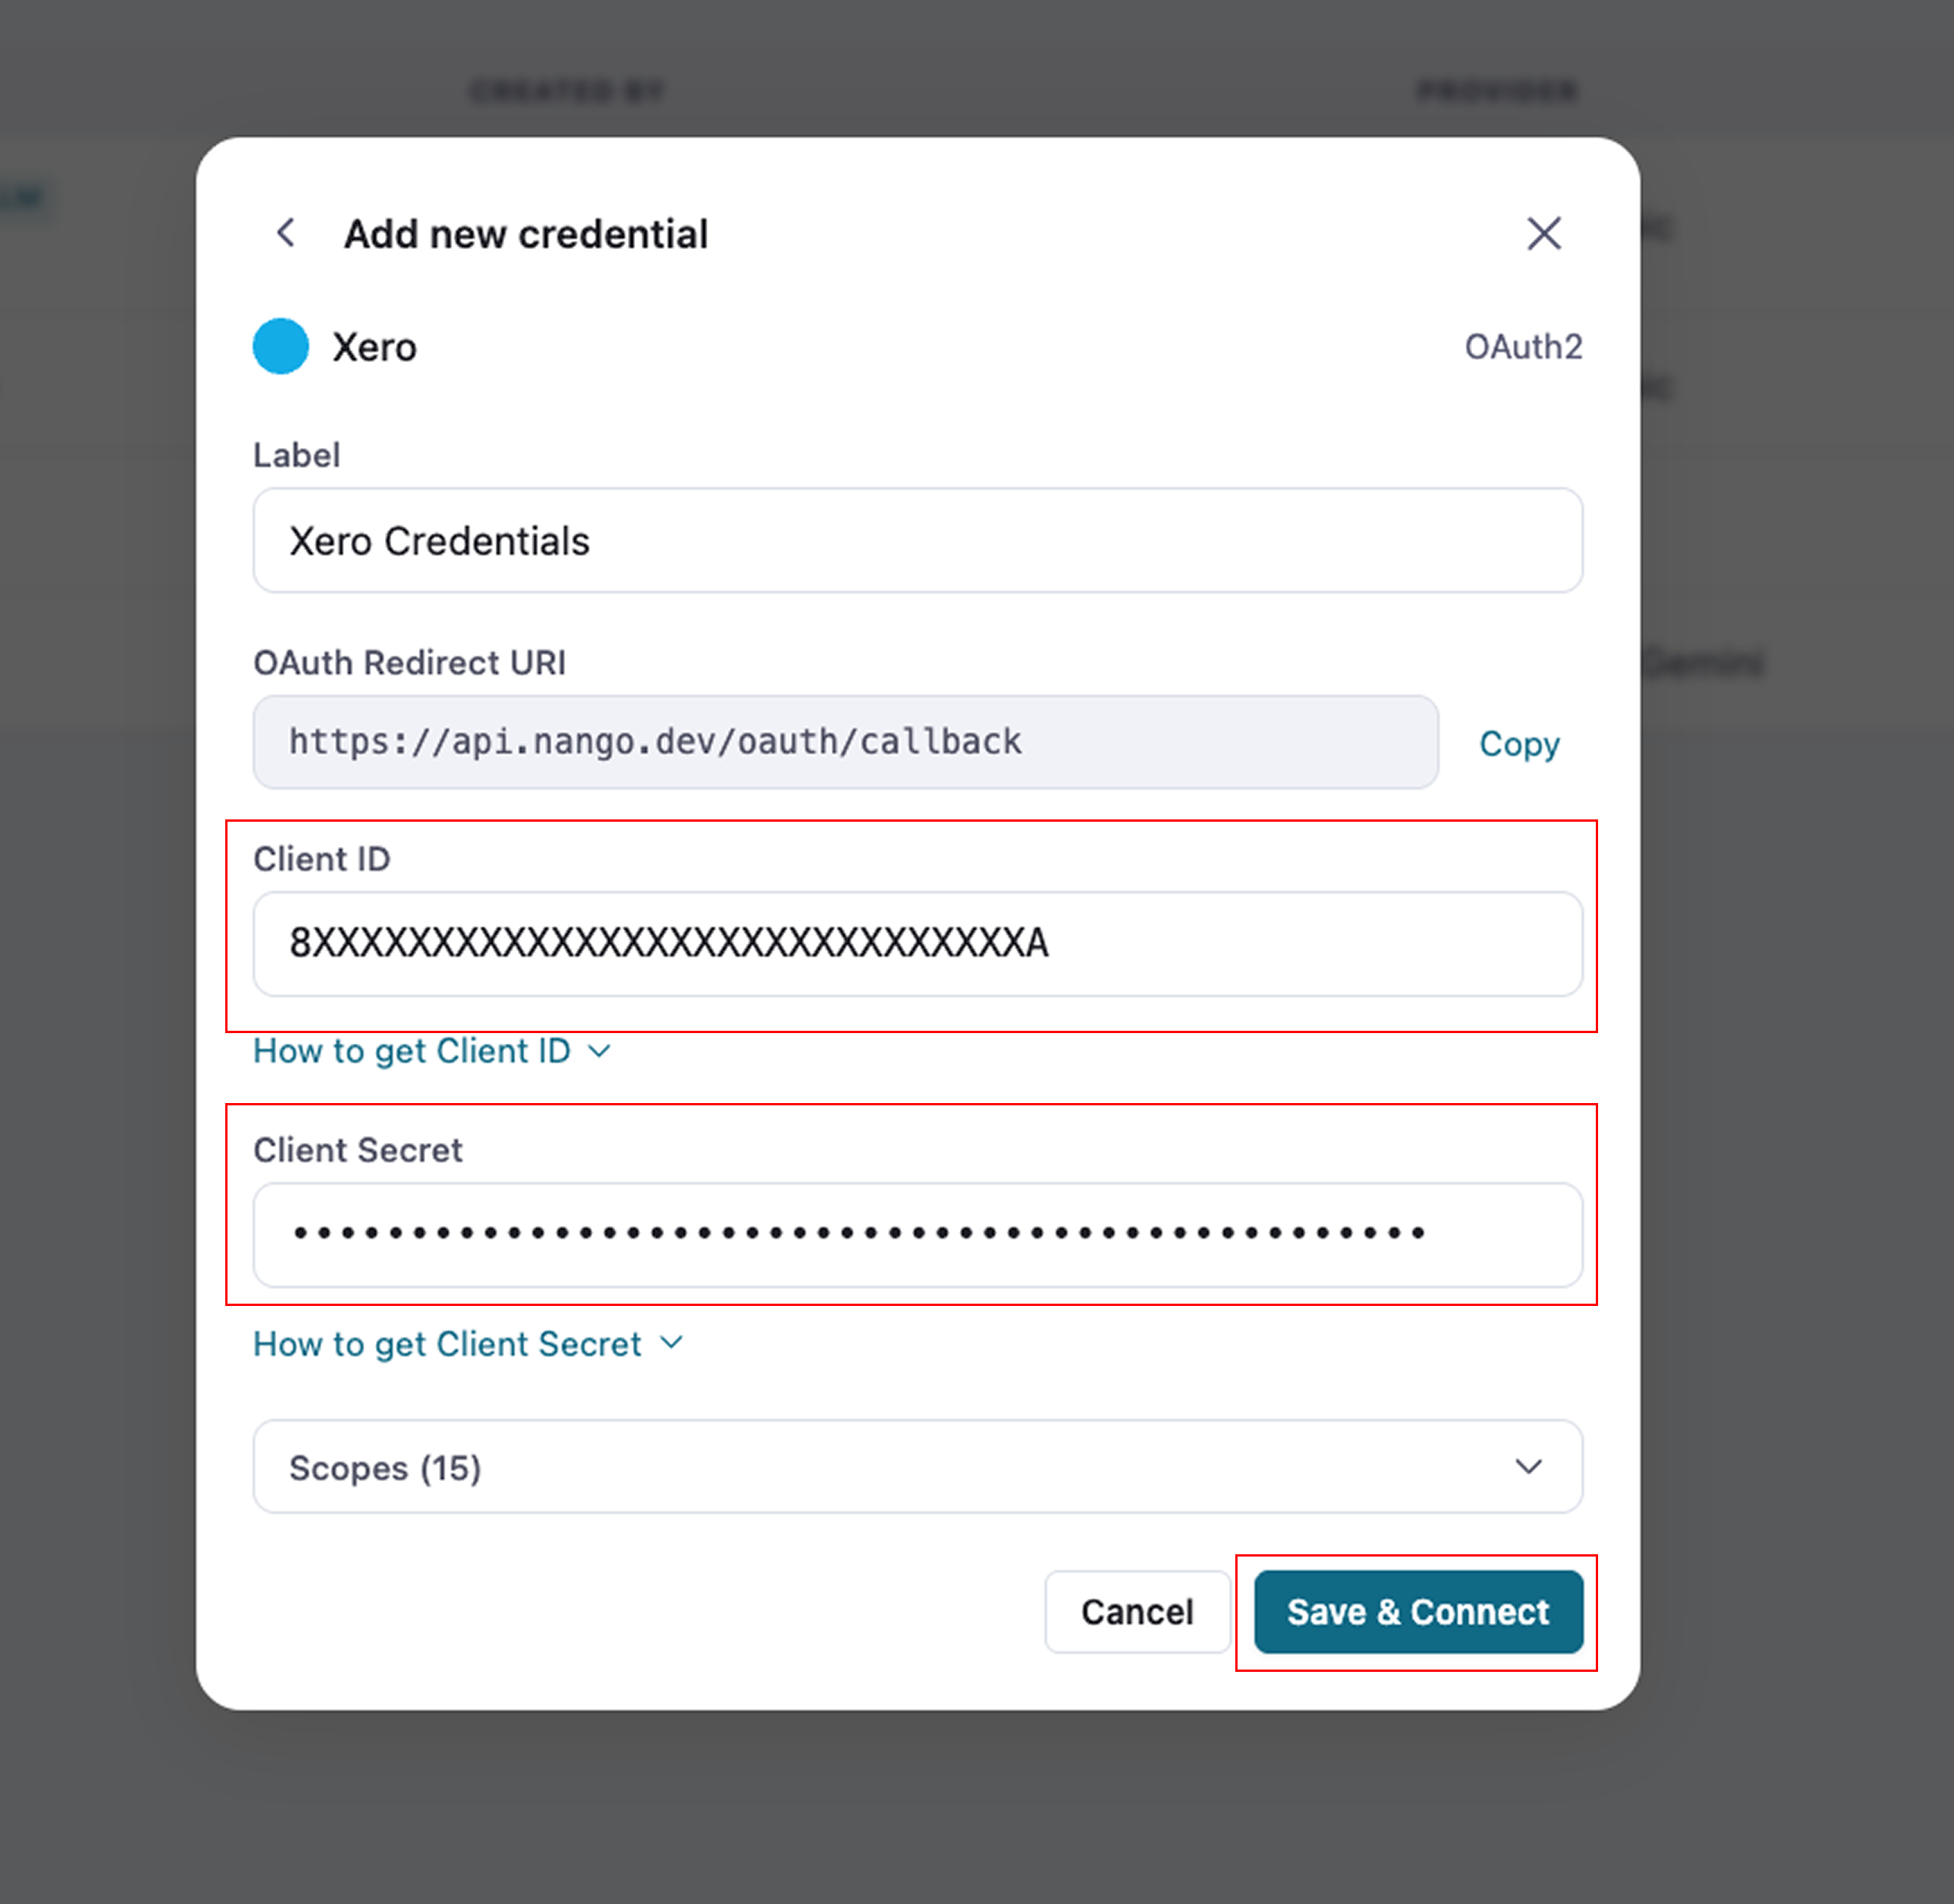
With the Client ID and Client Secret in hand, head over to Fibula. Open the Credentials page from the sidebar and click New Credential.
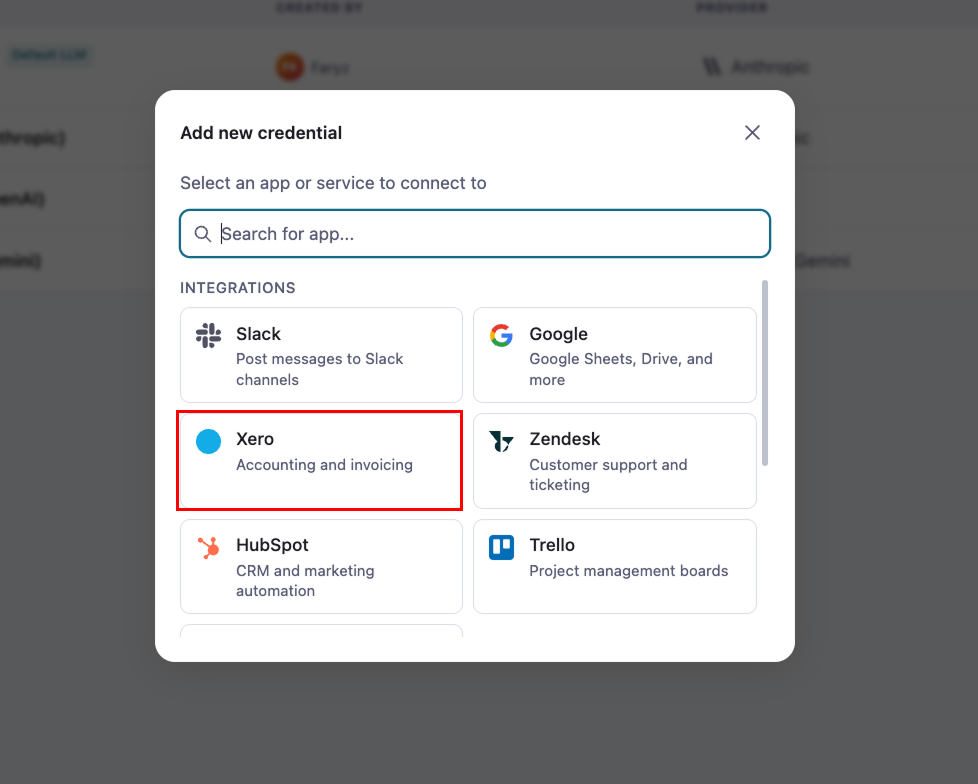
Pick Xero from the provider list.
Paste in the Client ID and Client Secret you copied from the Xero Configuration tab.
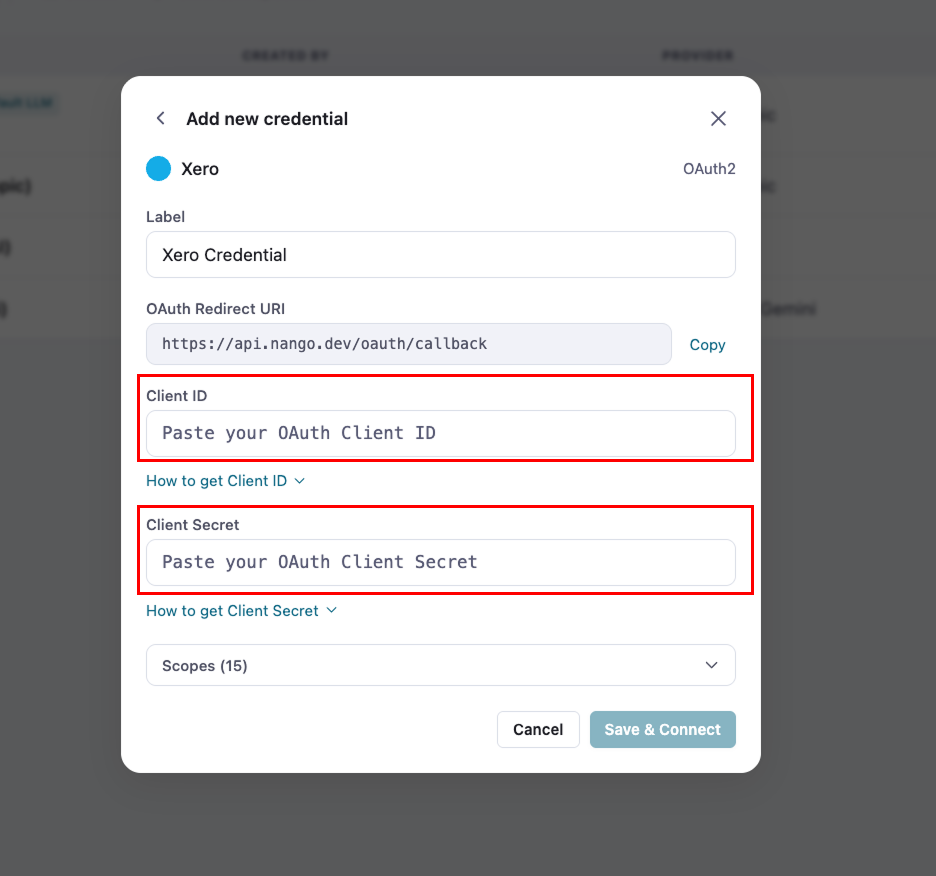
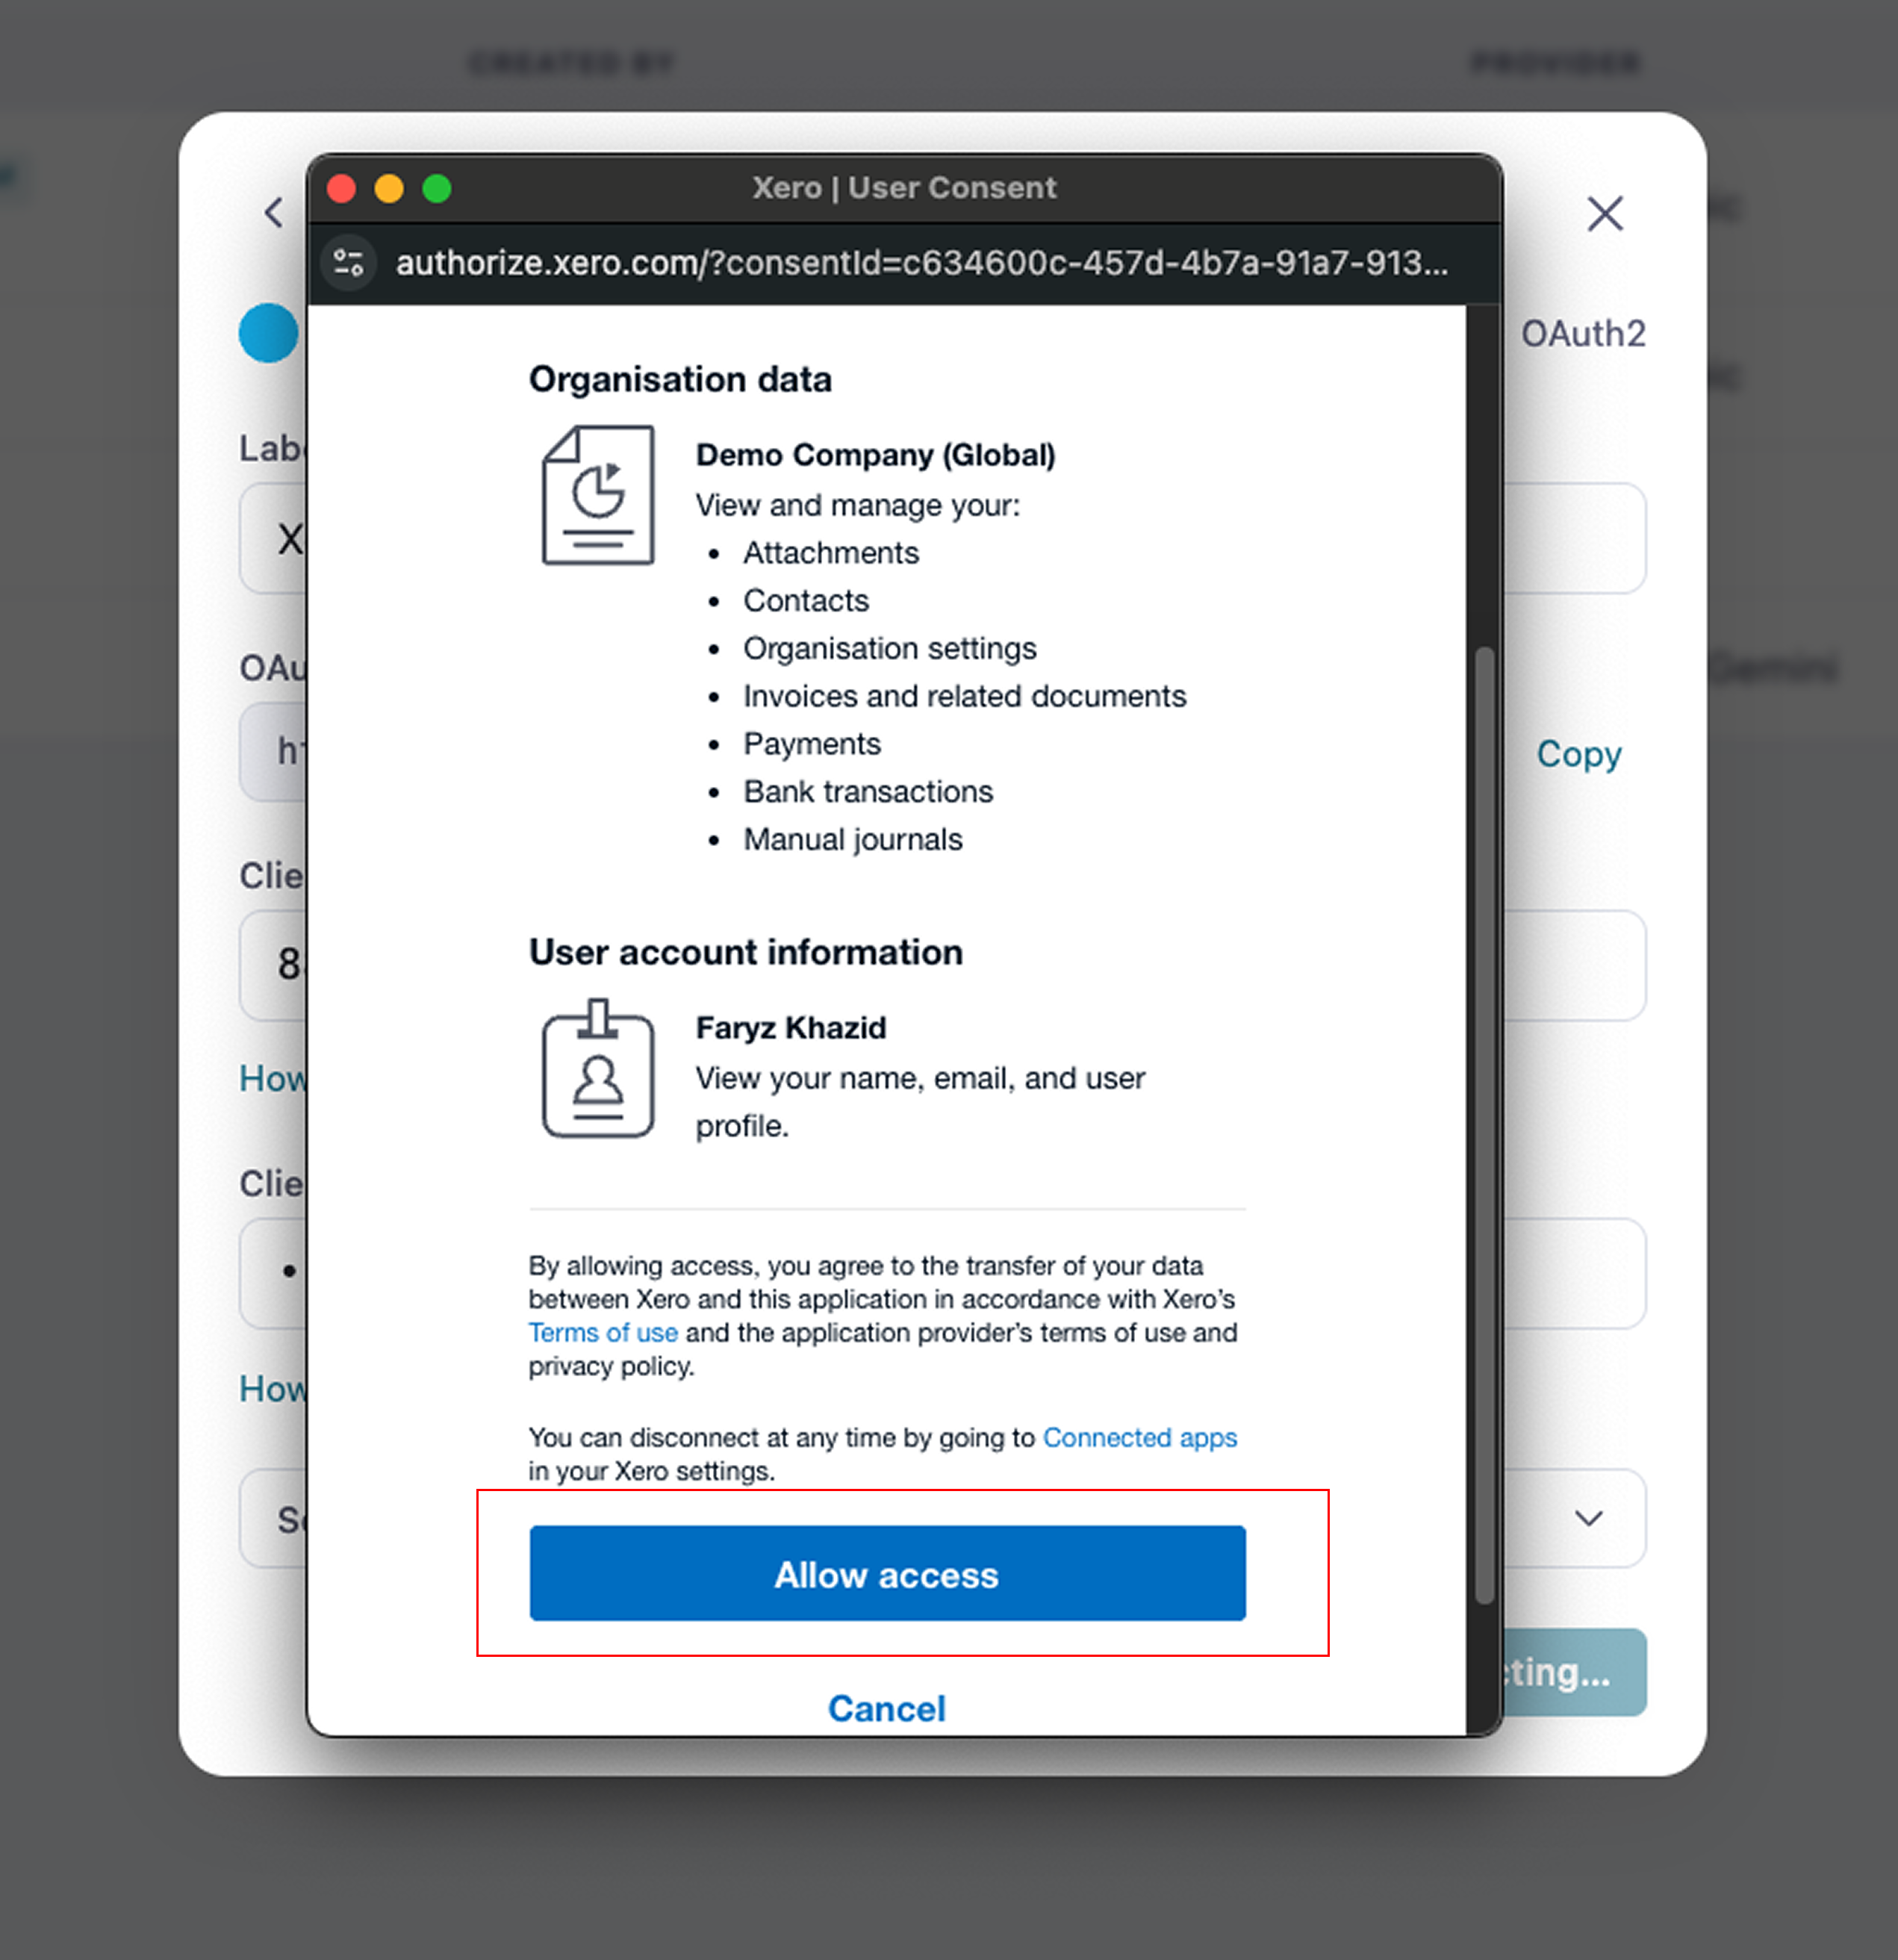
Double-check both values, then click Save and Connect. Fibula bounces you to Xero to grant access.
Xero asks which organisation Fibula should connect to. Pick the right one and click Allow access.
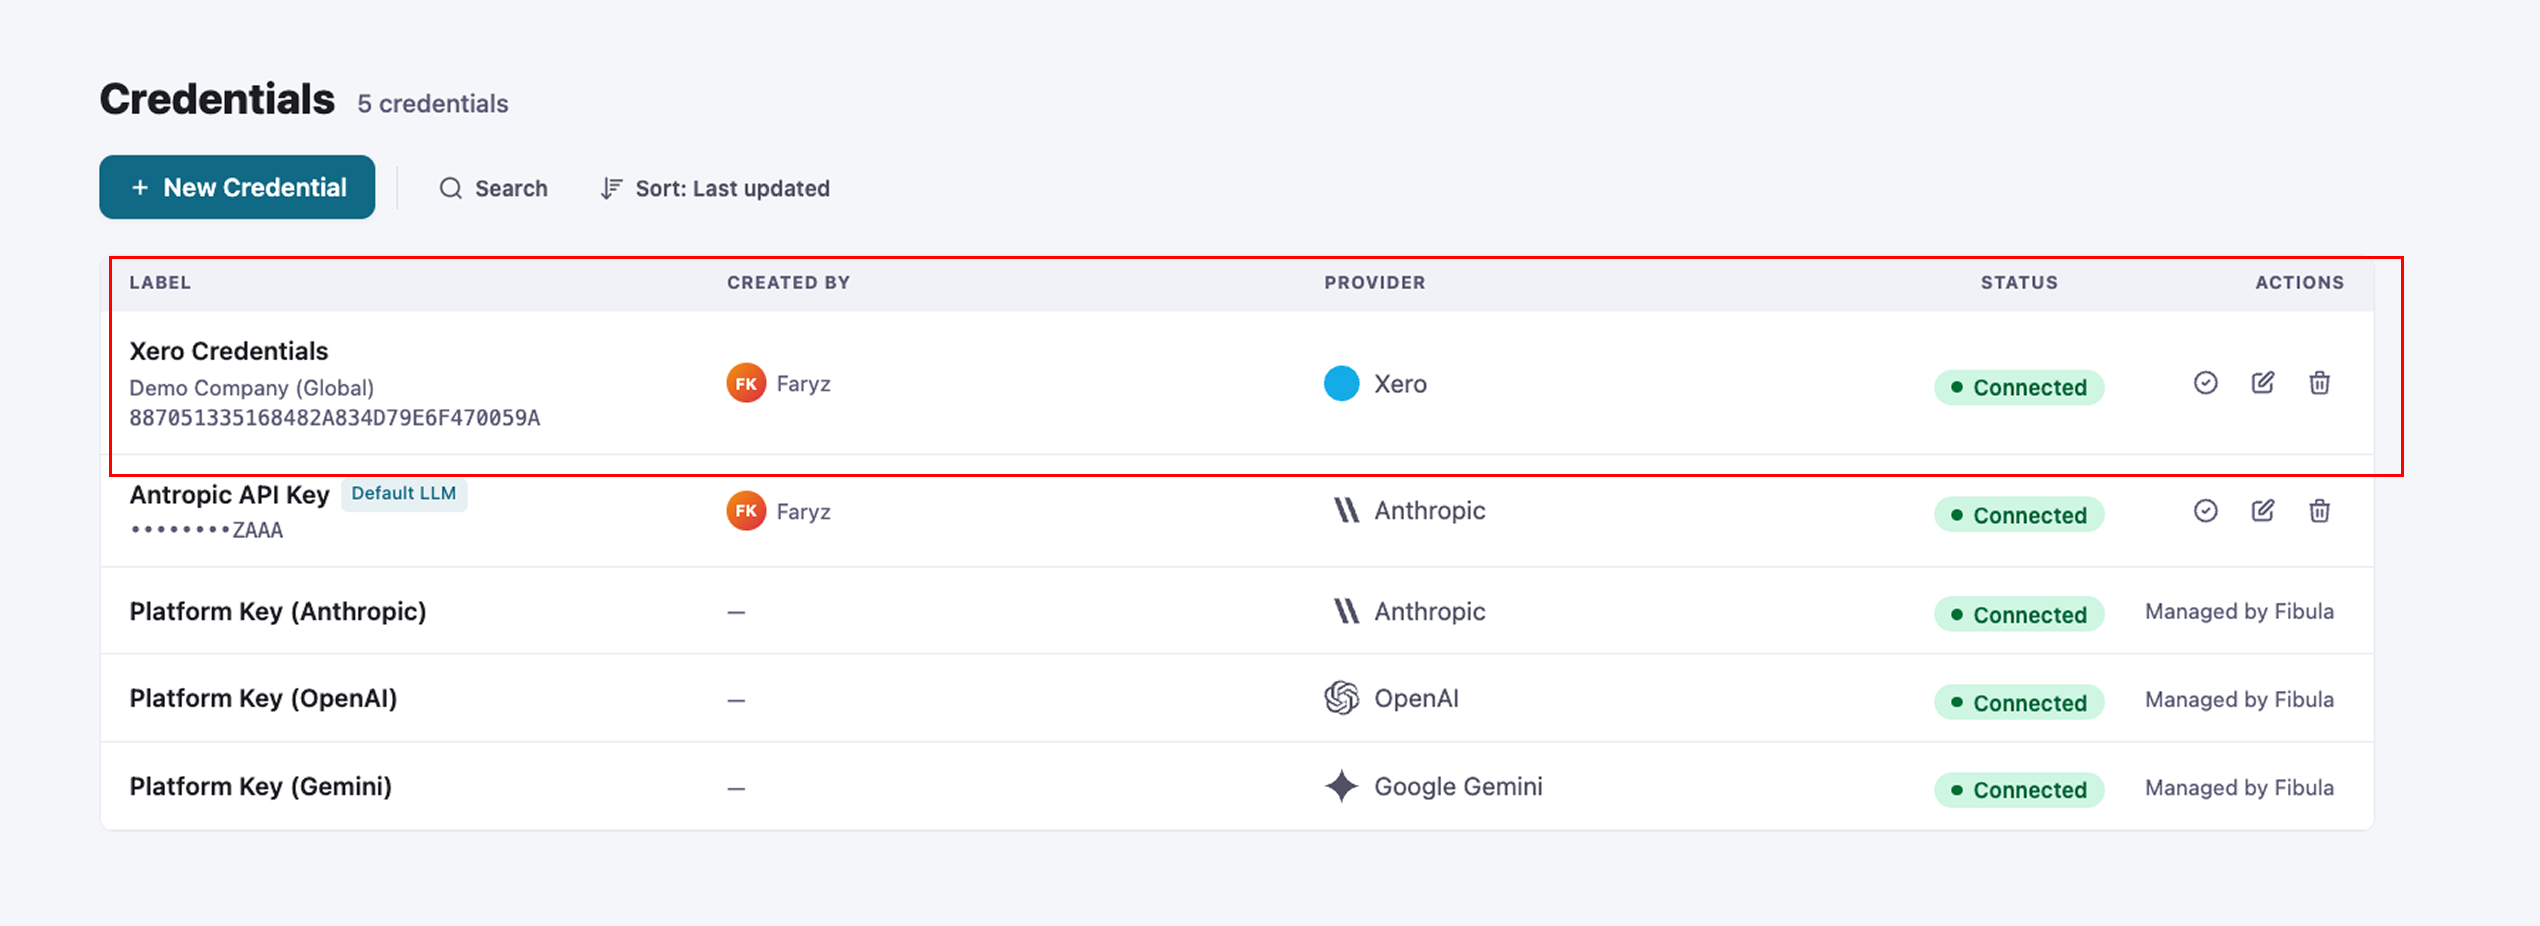
Xero sends you back to Fibula. The credential is saved and ready to use in any Xero workflow.
Step 3. Use Xero in a workflow
Now that Xero is connected, you don't have to build anything by hand. From here it is just workflows.
Open the Fibula agent chat and tell it what you want. Something like "When an invoice comes in by email, create a draft bill in Xero." Plain English is enough.
The agent picks the right node mix for you. An Email Trigger to catch the invoice, a Document Schema to read it, and the right outbound action on your Xero credential. It wires the fields together so the vendor, amount, due date, and line items land where they should. You review the canvas and click Publish.
The most common first workflow looks exactly like that. Forward an invoice, get a Xero draft bill a few seconds later.
Troubleshooting
- I cannot find Generate a secret. Make sure you are on the Configuration tab, not the Overview tab. The secret button only appears under Configuration.
- OAuth redirect URI mismatch. The redirect URI in your Xero app must match the one Fibula uses. Copy the URI from Fibula's New Credential screen, paste it into the Xero app's Configuration tab, and save the Xero app before retrying.
- Xero rejected the credentials. Client ID and Client Secret are case-sensitive and have no spaces. Re-copy both from the Xero Configuration tab and paste them into Fibula again.
- I closed the secret page before copying. Head back to the Configuration tab and click Generate a secret again. Xero will mint a new one and invalidate the old.