Your first Fibula workflow, in 5 minutes
Open the chat, tell Fibula what you want, watch the agent build it, publish, and start dropping documents into the folder it just created for you.
What you'll build
A working workflow that reads any document you throw at it, pulls out the fields you care about, and gives you the structured data back. No canvas dragging, no node wiring. You stay in chat. Fibula's agent does the building.
By the end you'll have a published workflow and a Document Folder where you can drop more documents to process them.
Before you start
You'll need:
- A Fibula account. Sign in with Google.
- A document or two to test with. PDFs, scans, photos. Any format works.
- About five minutes.
Step 1. Open Fibula, land in chat
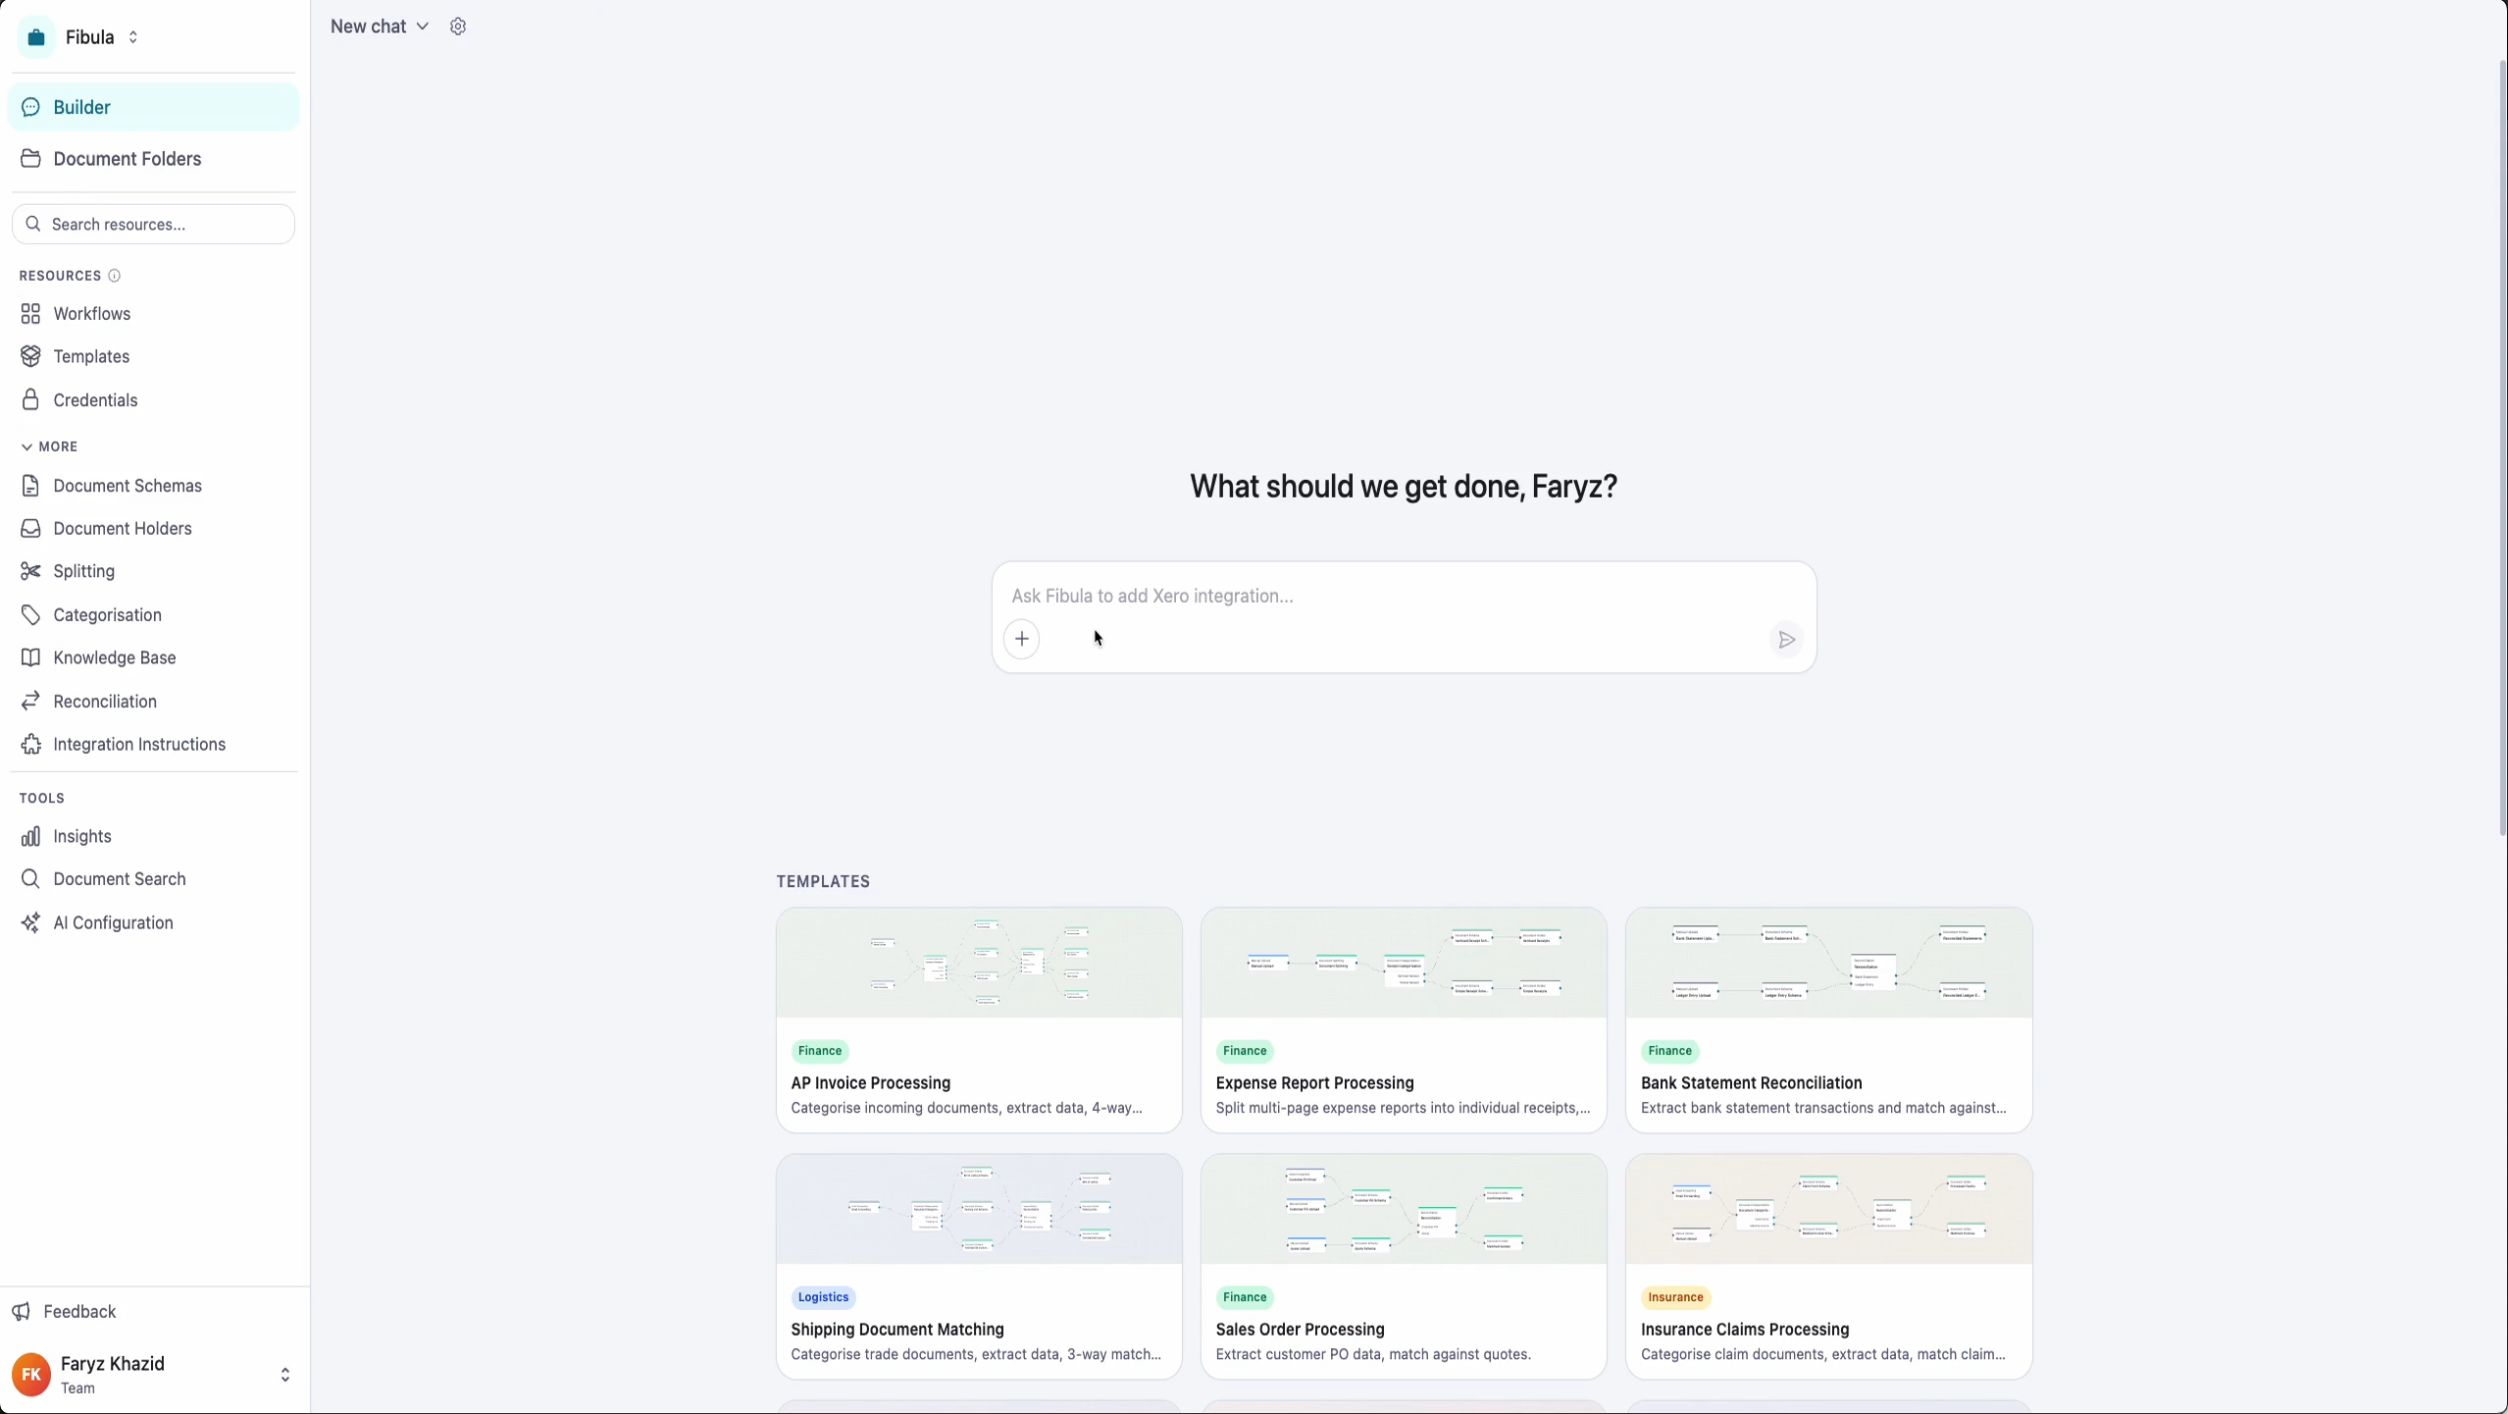
When you open Fibula, you land on the agent chat. This is the home of the platform. Everything starts here.
Step 2. Tell the agent what you want
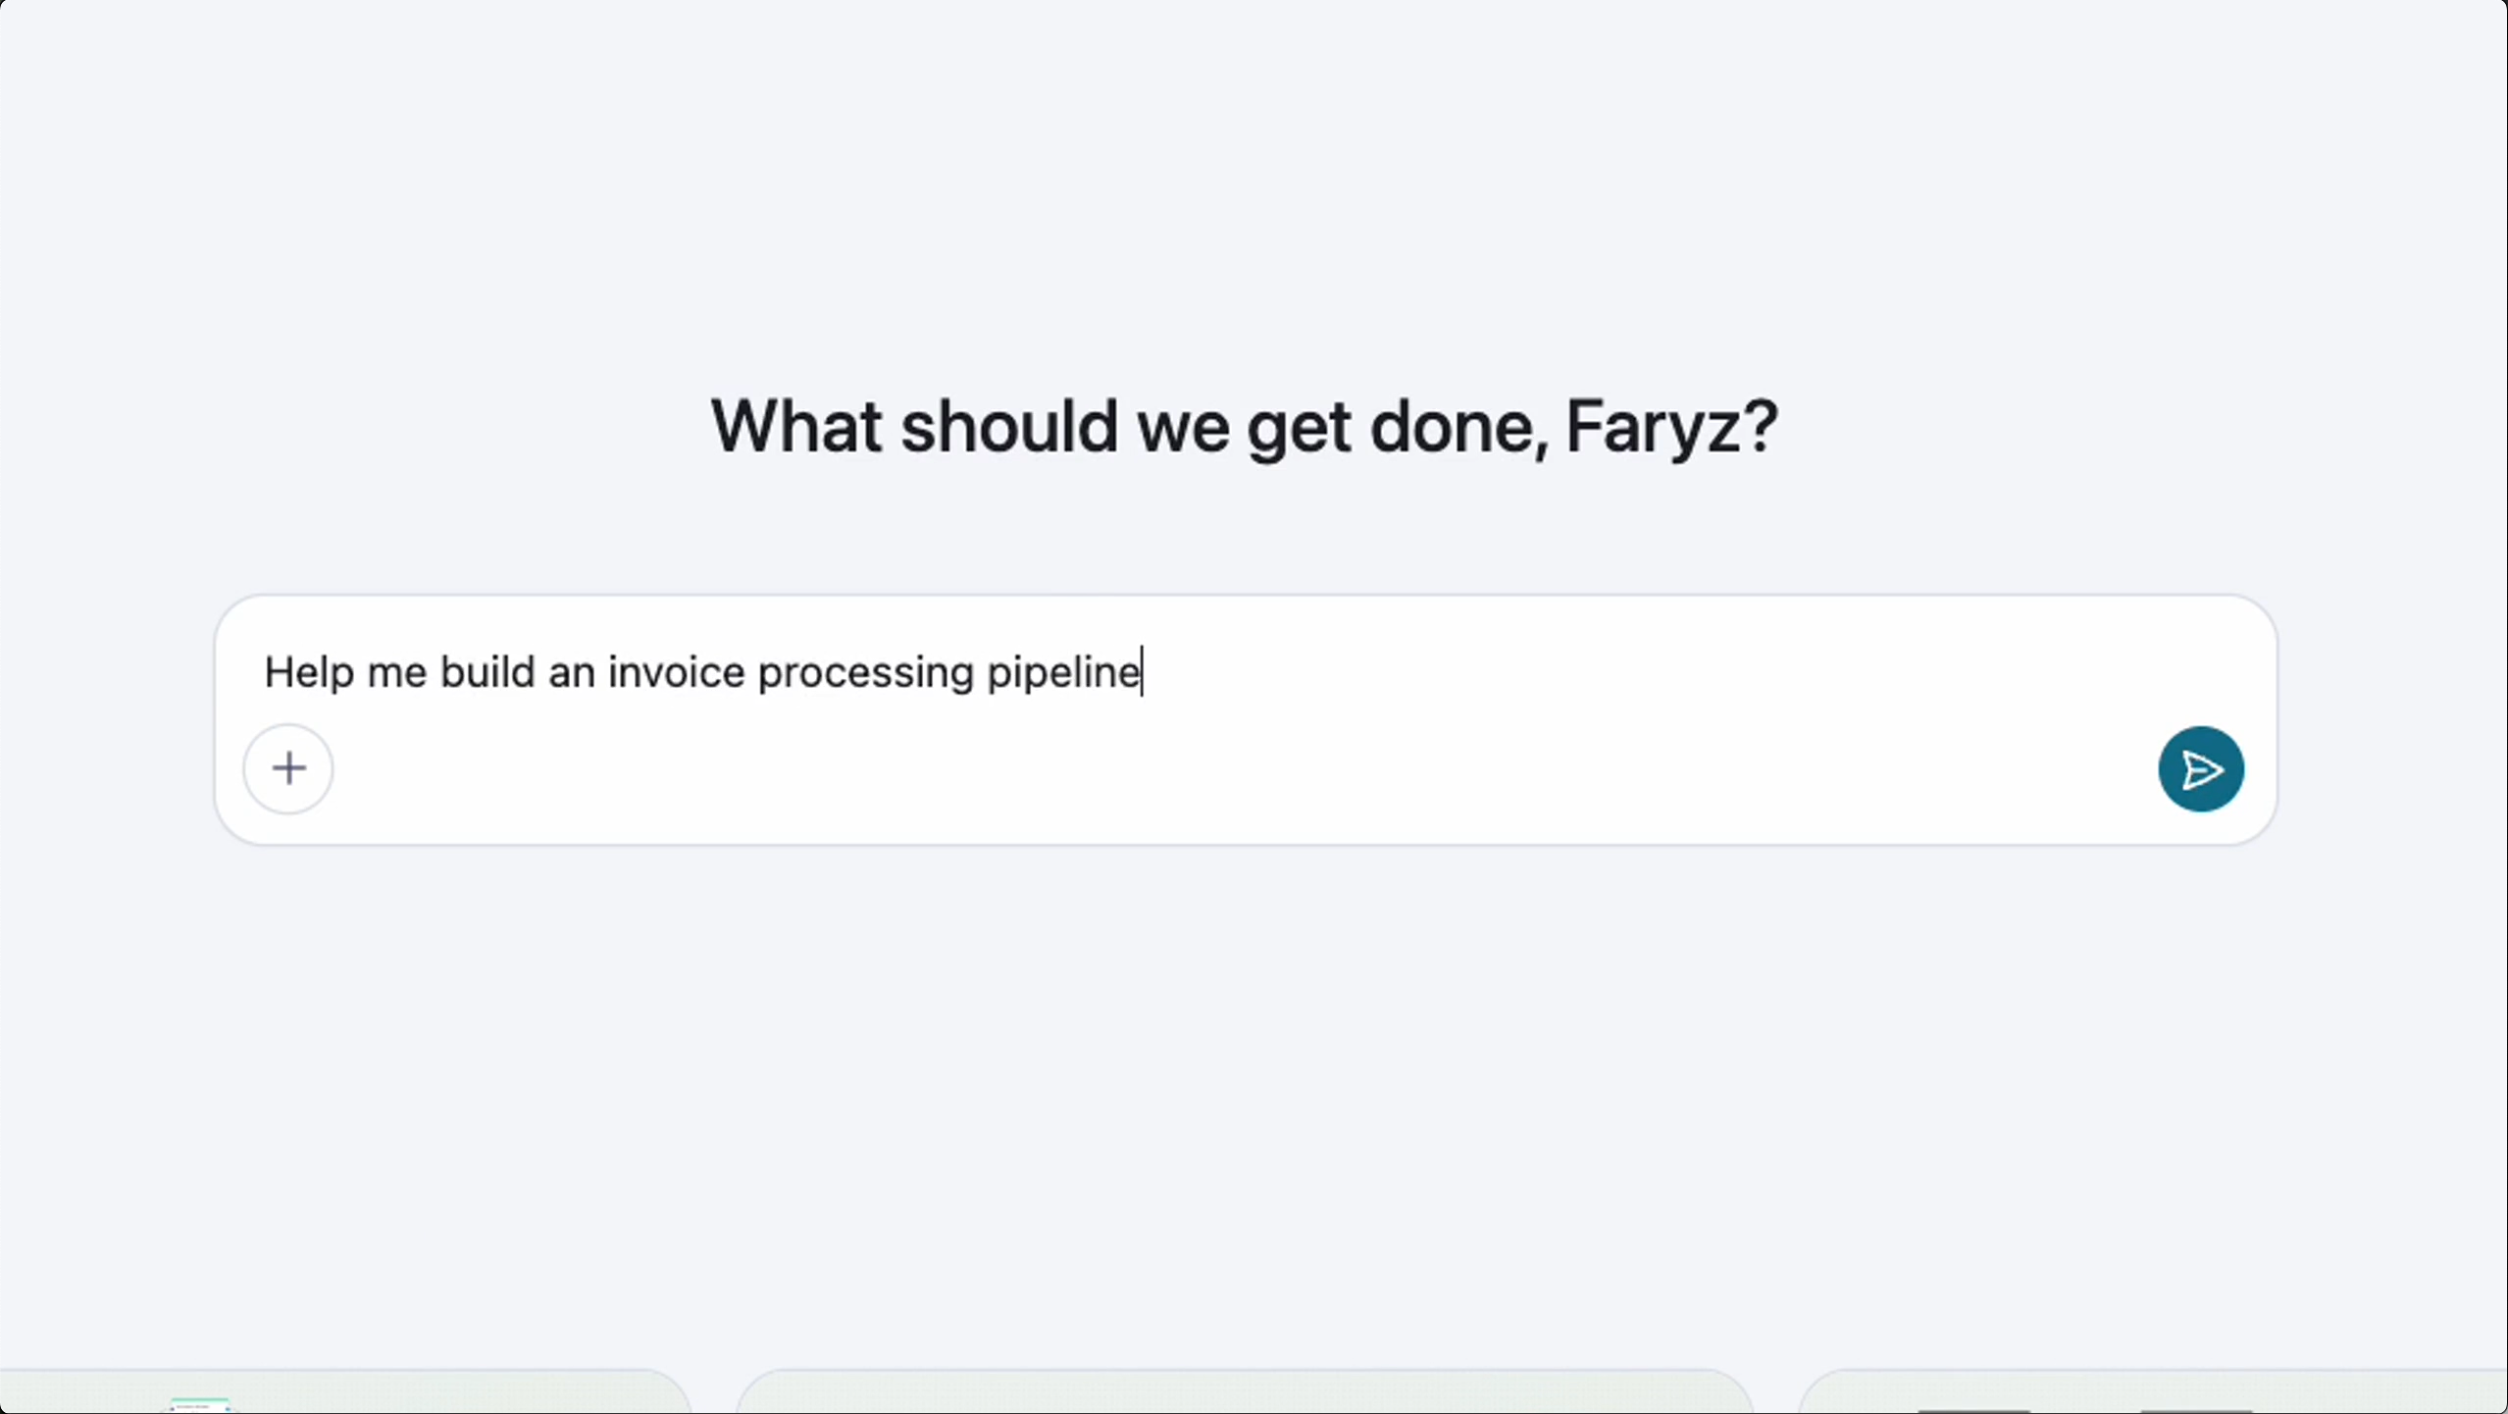
Type in plain English what you want to automate. Be specific about what to extract. For example: "I want to process supplier invoices and pull out the vendor name, total amount, and due date."
Step 3. The agent builds the workflow
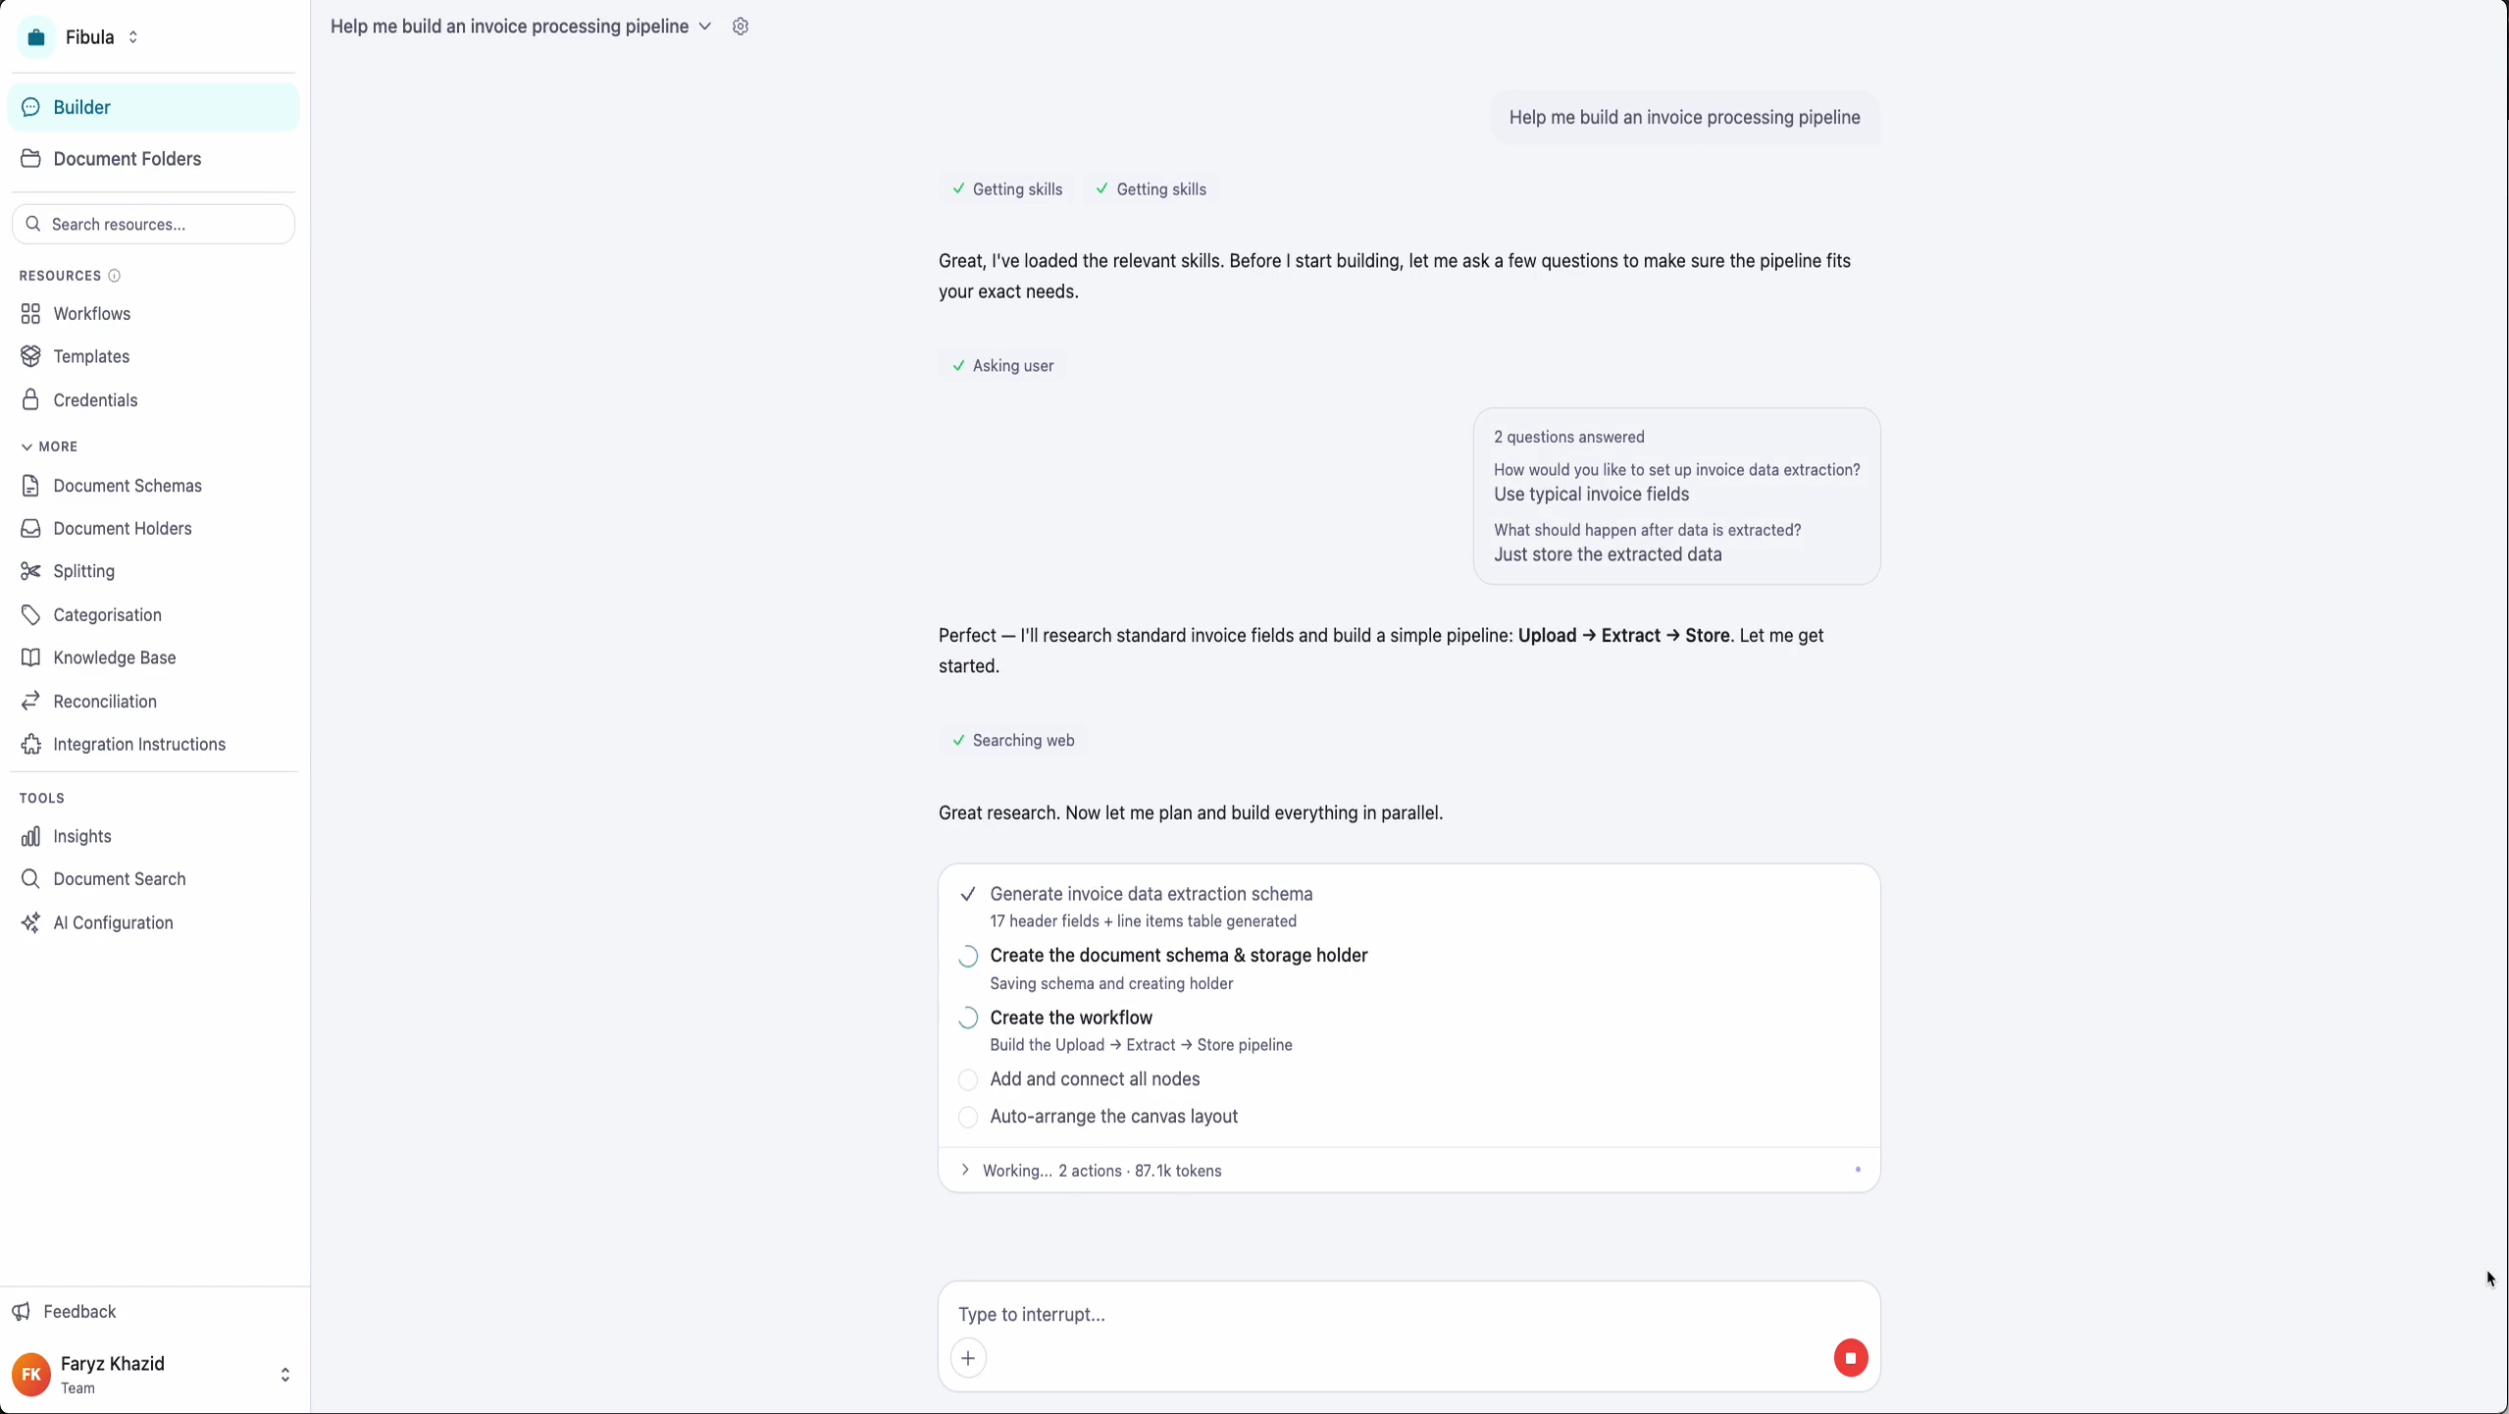
The agent takes over. It picks the right node types, configures them, and reports back in the chat as it goes. You can read along.
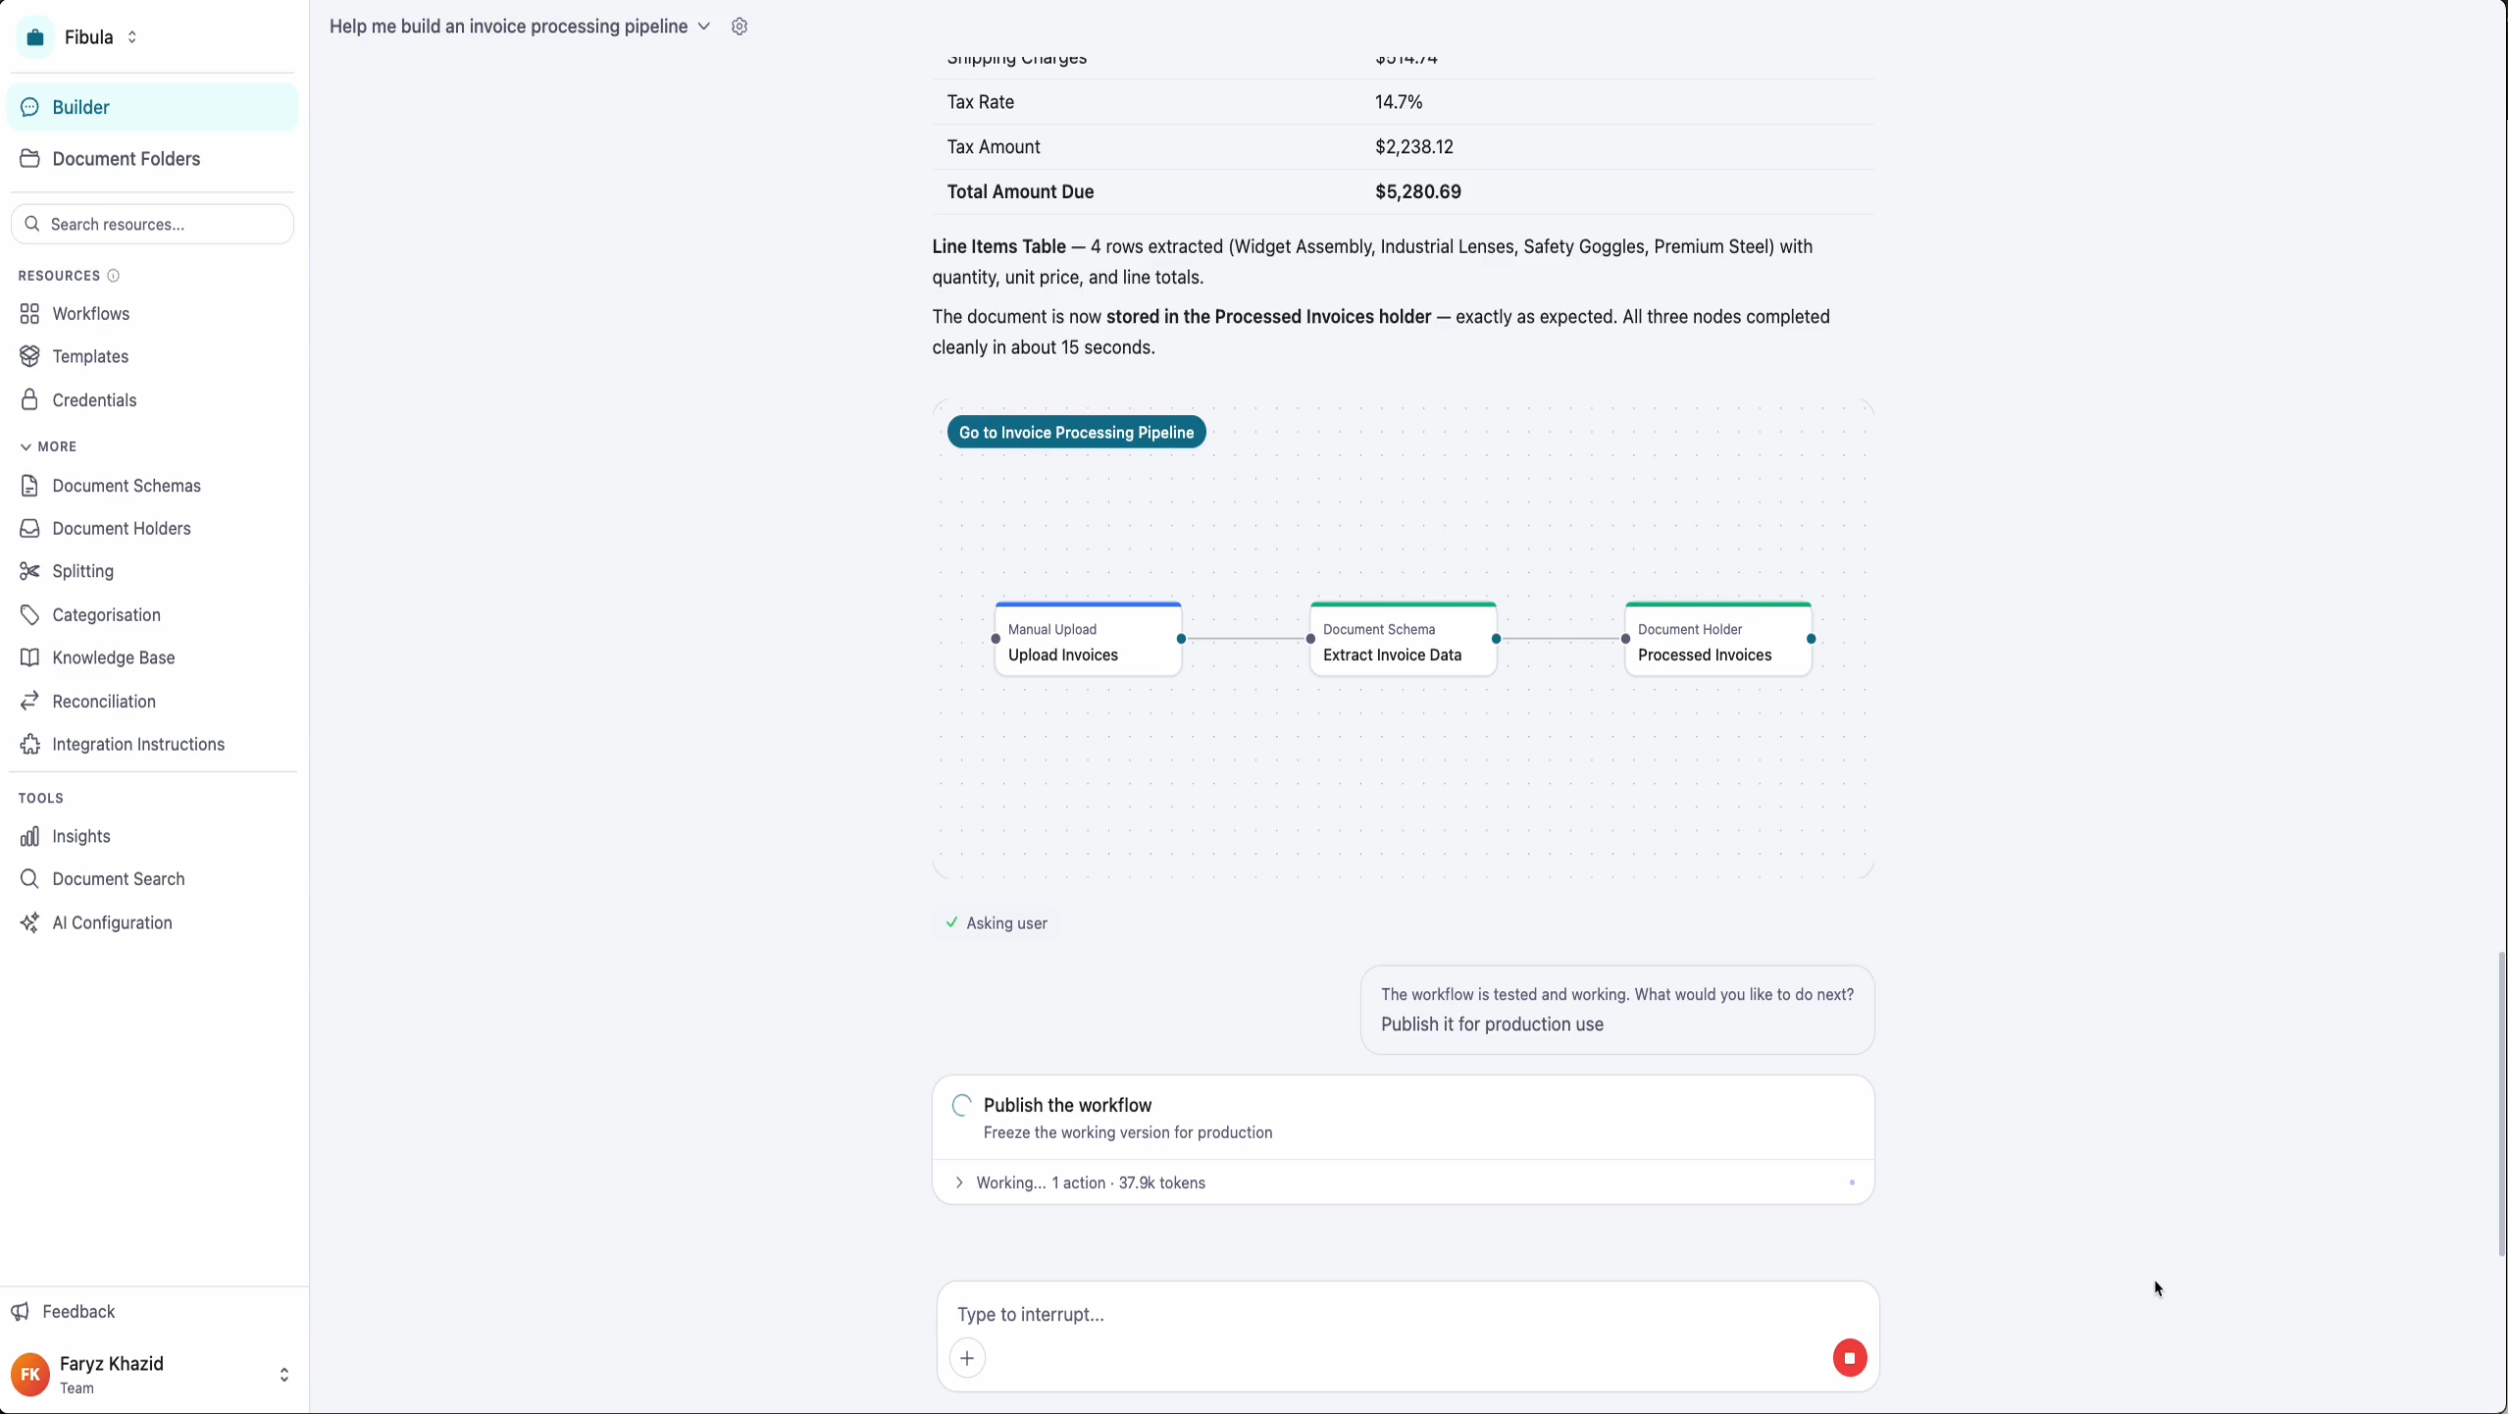
When it's done, the agent renders the finished workflow inline in the chat so you can see exactly what it built. Review the nodes and the connections, then move on.
Step 4. Publish the workflow
Happy with what the agent built? Tell it to publish. The agent confirms, then gives you a link to the Document Folder it just created for this workflow.
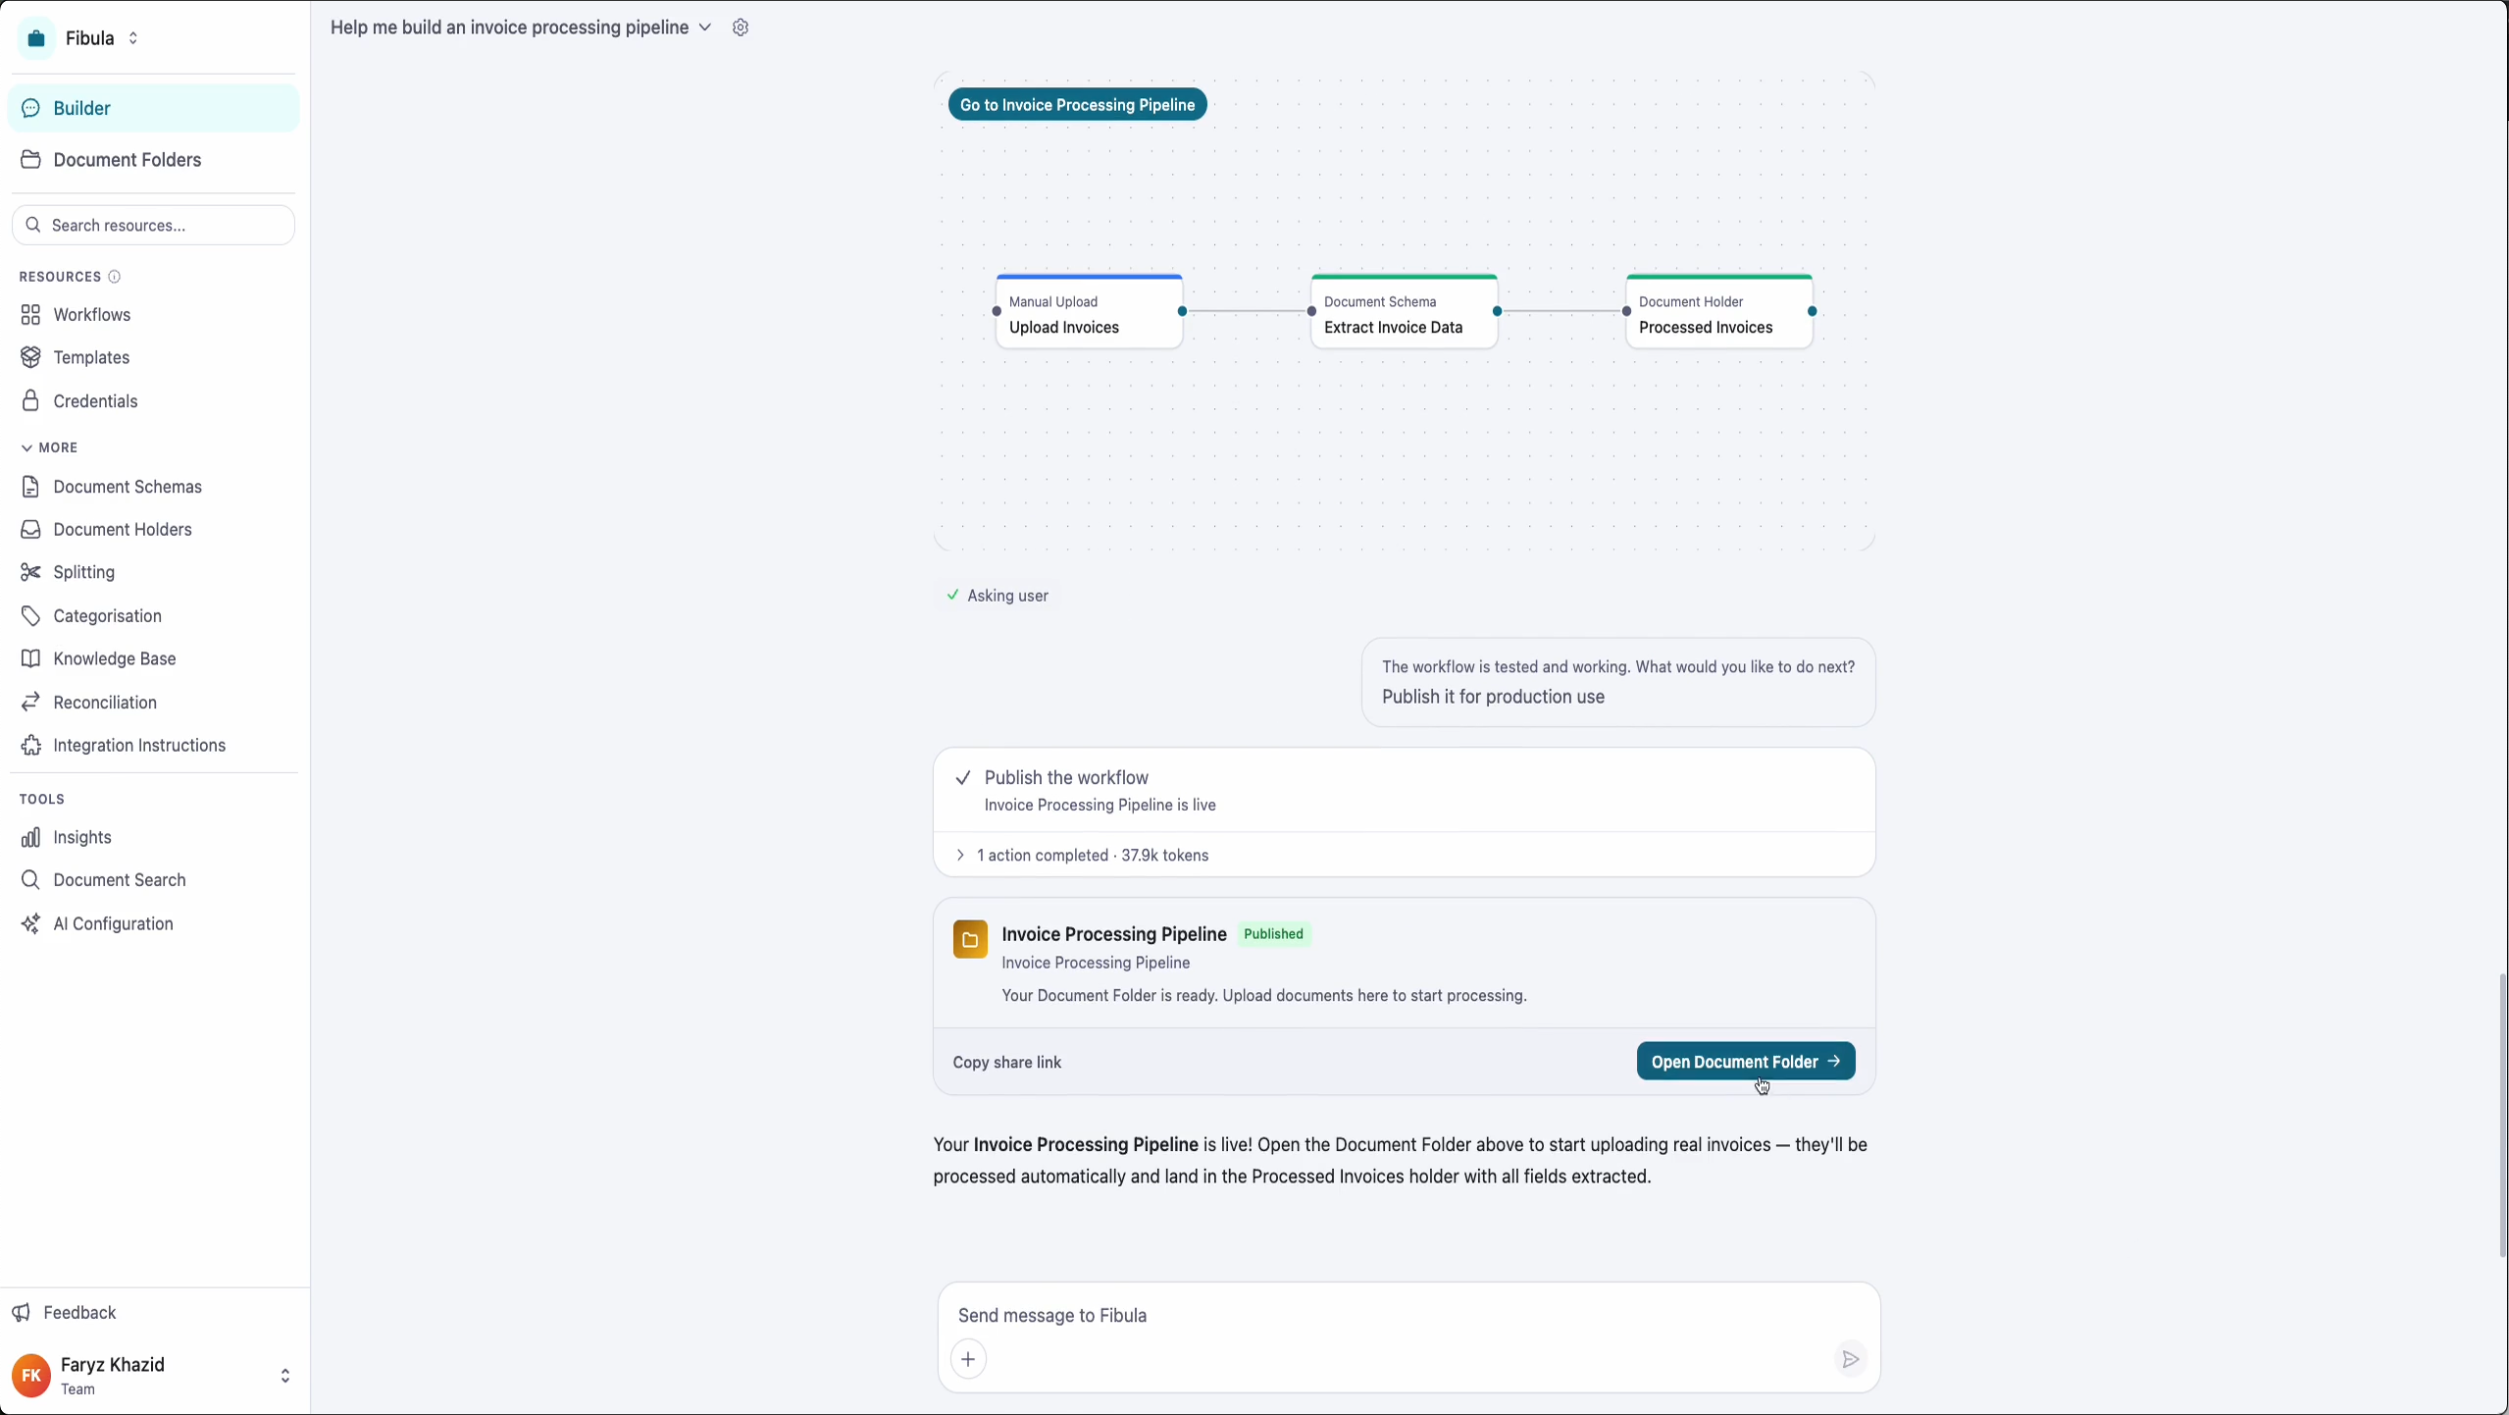
If something looks off, ask the agent to test first or tweak something specific. You don't need to leave chat to do any of this.
Step 5. Upload documents, download the data
Open the Document Folder. This is the runtime view for the workflow you just published. Drop documents in to process them.
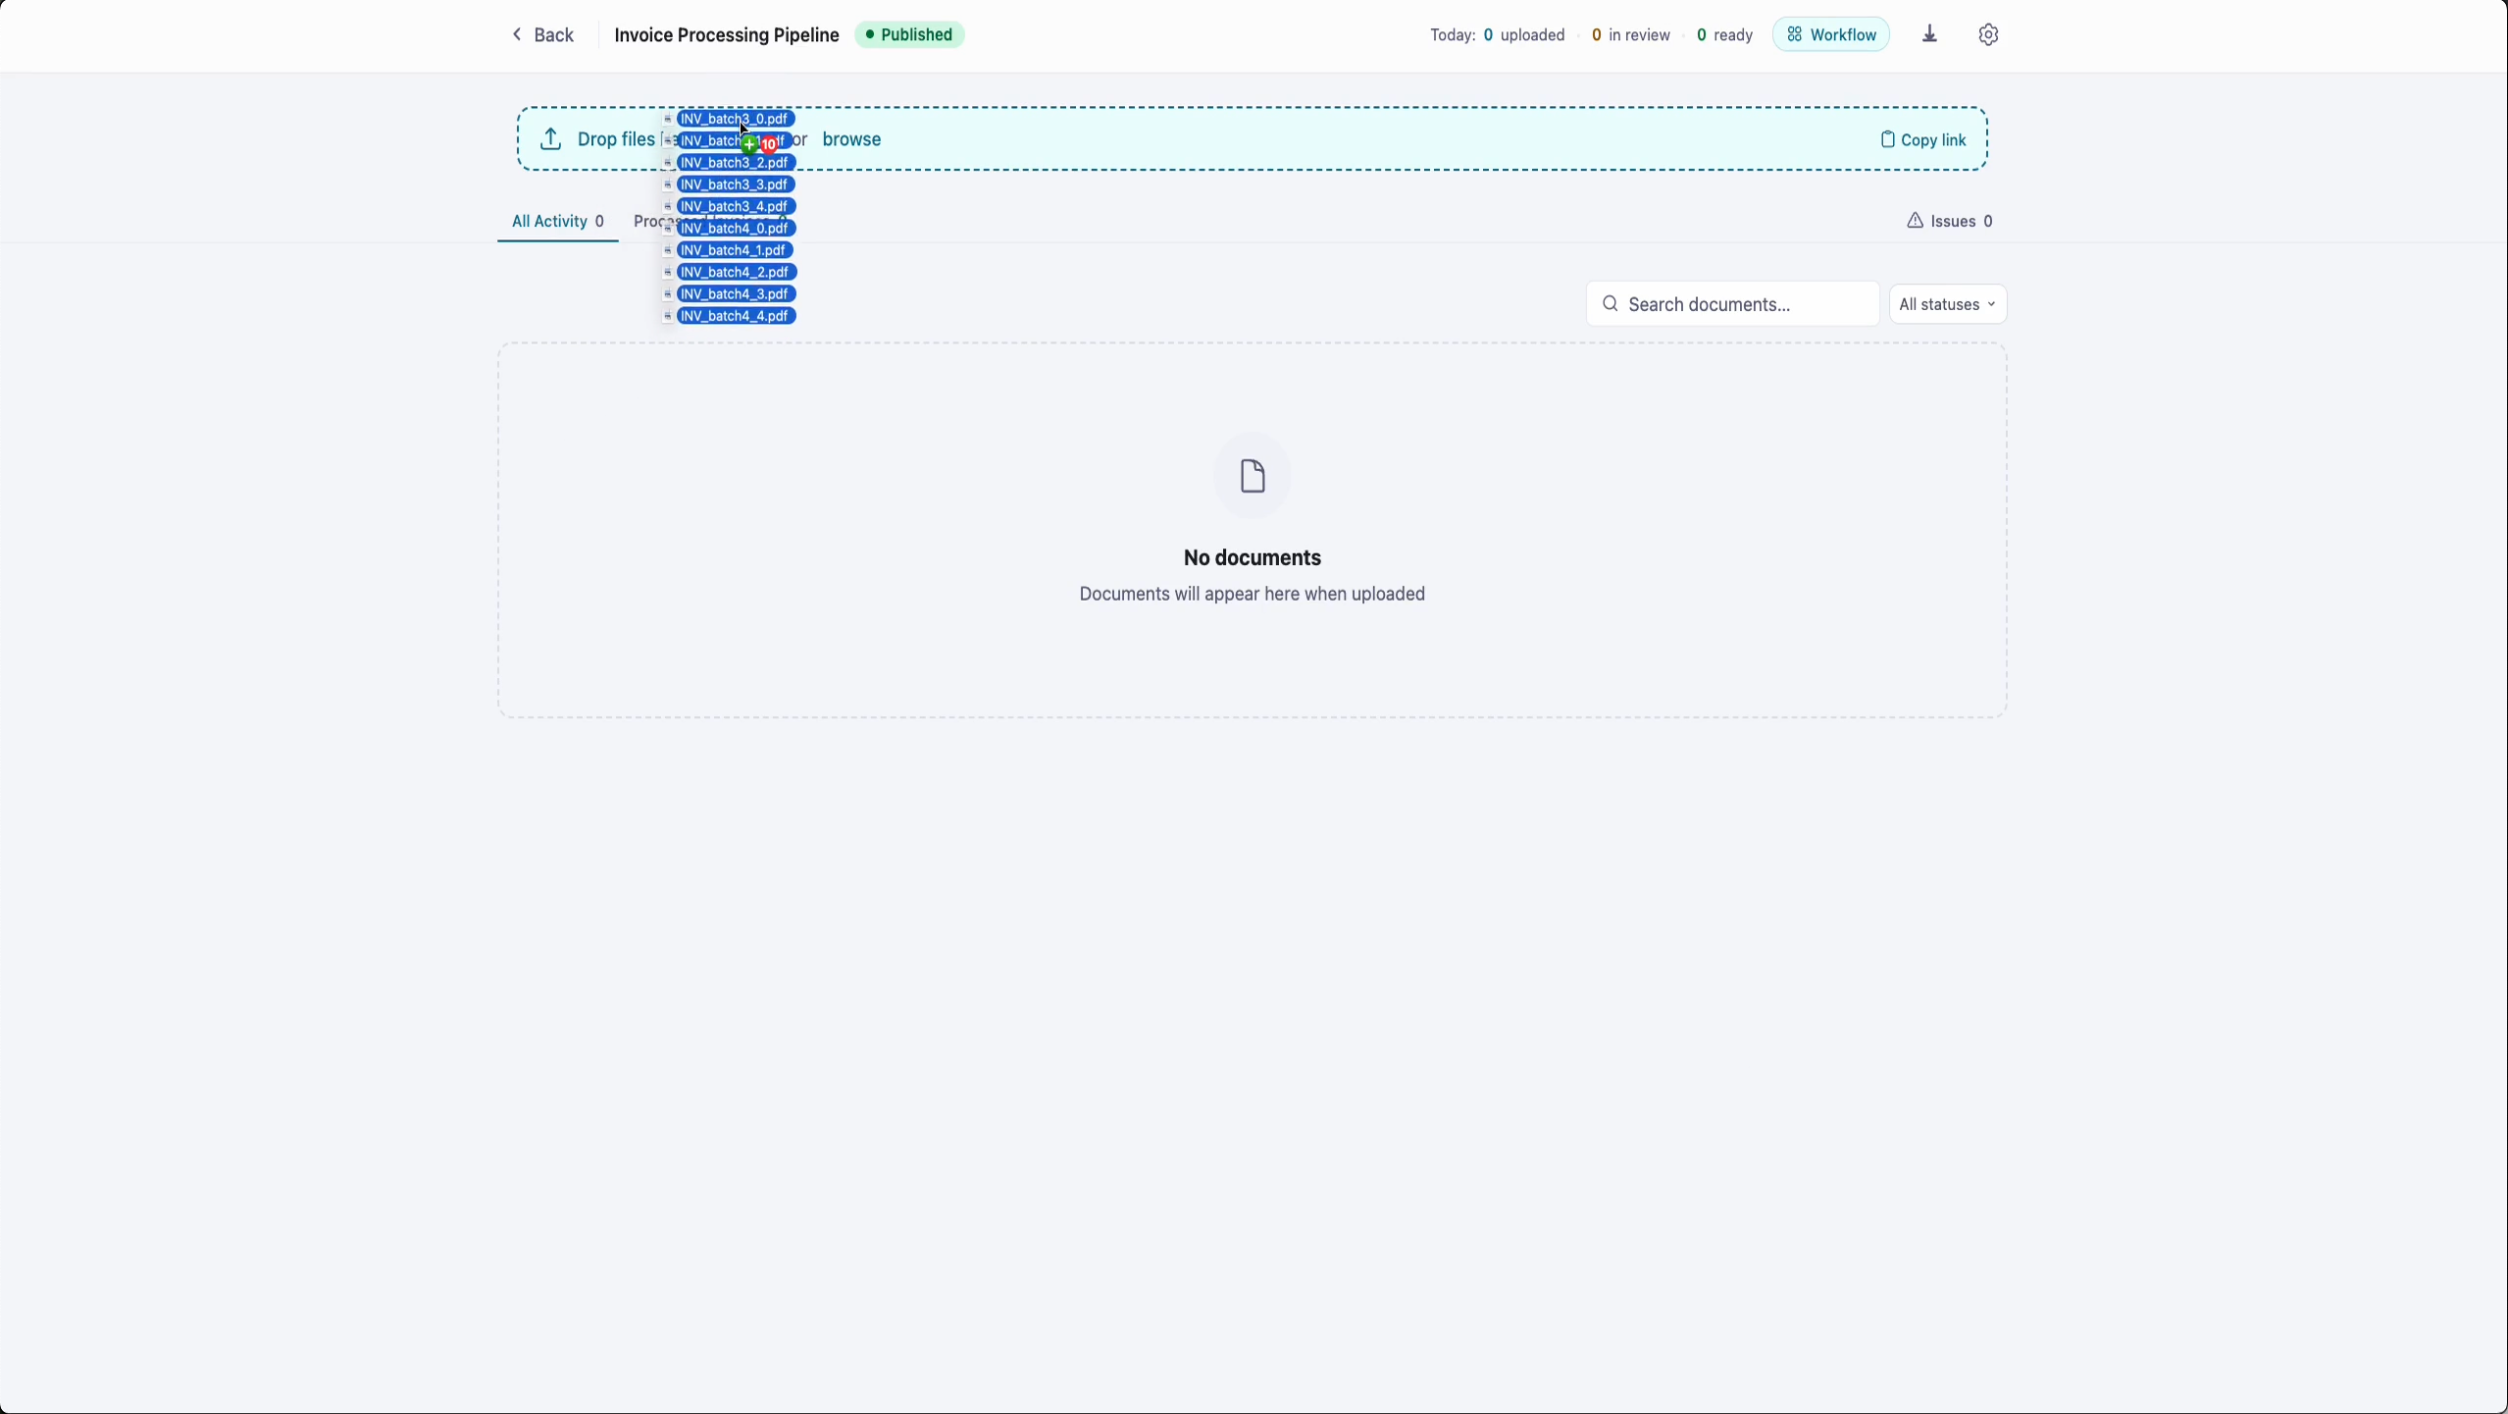
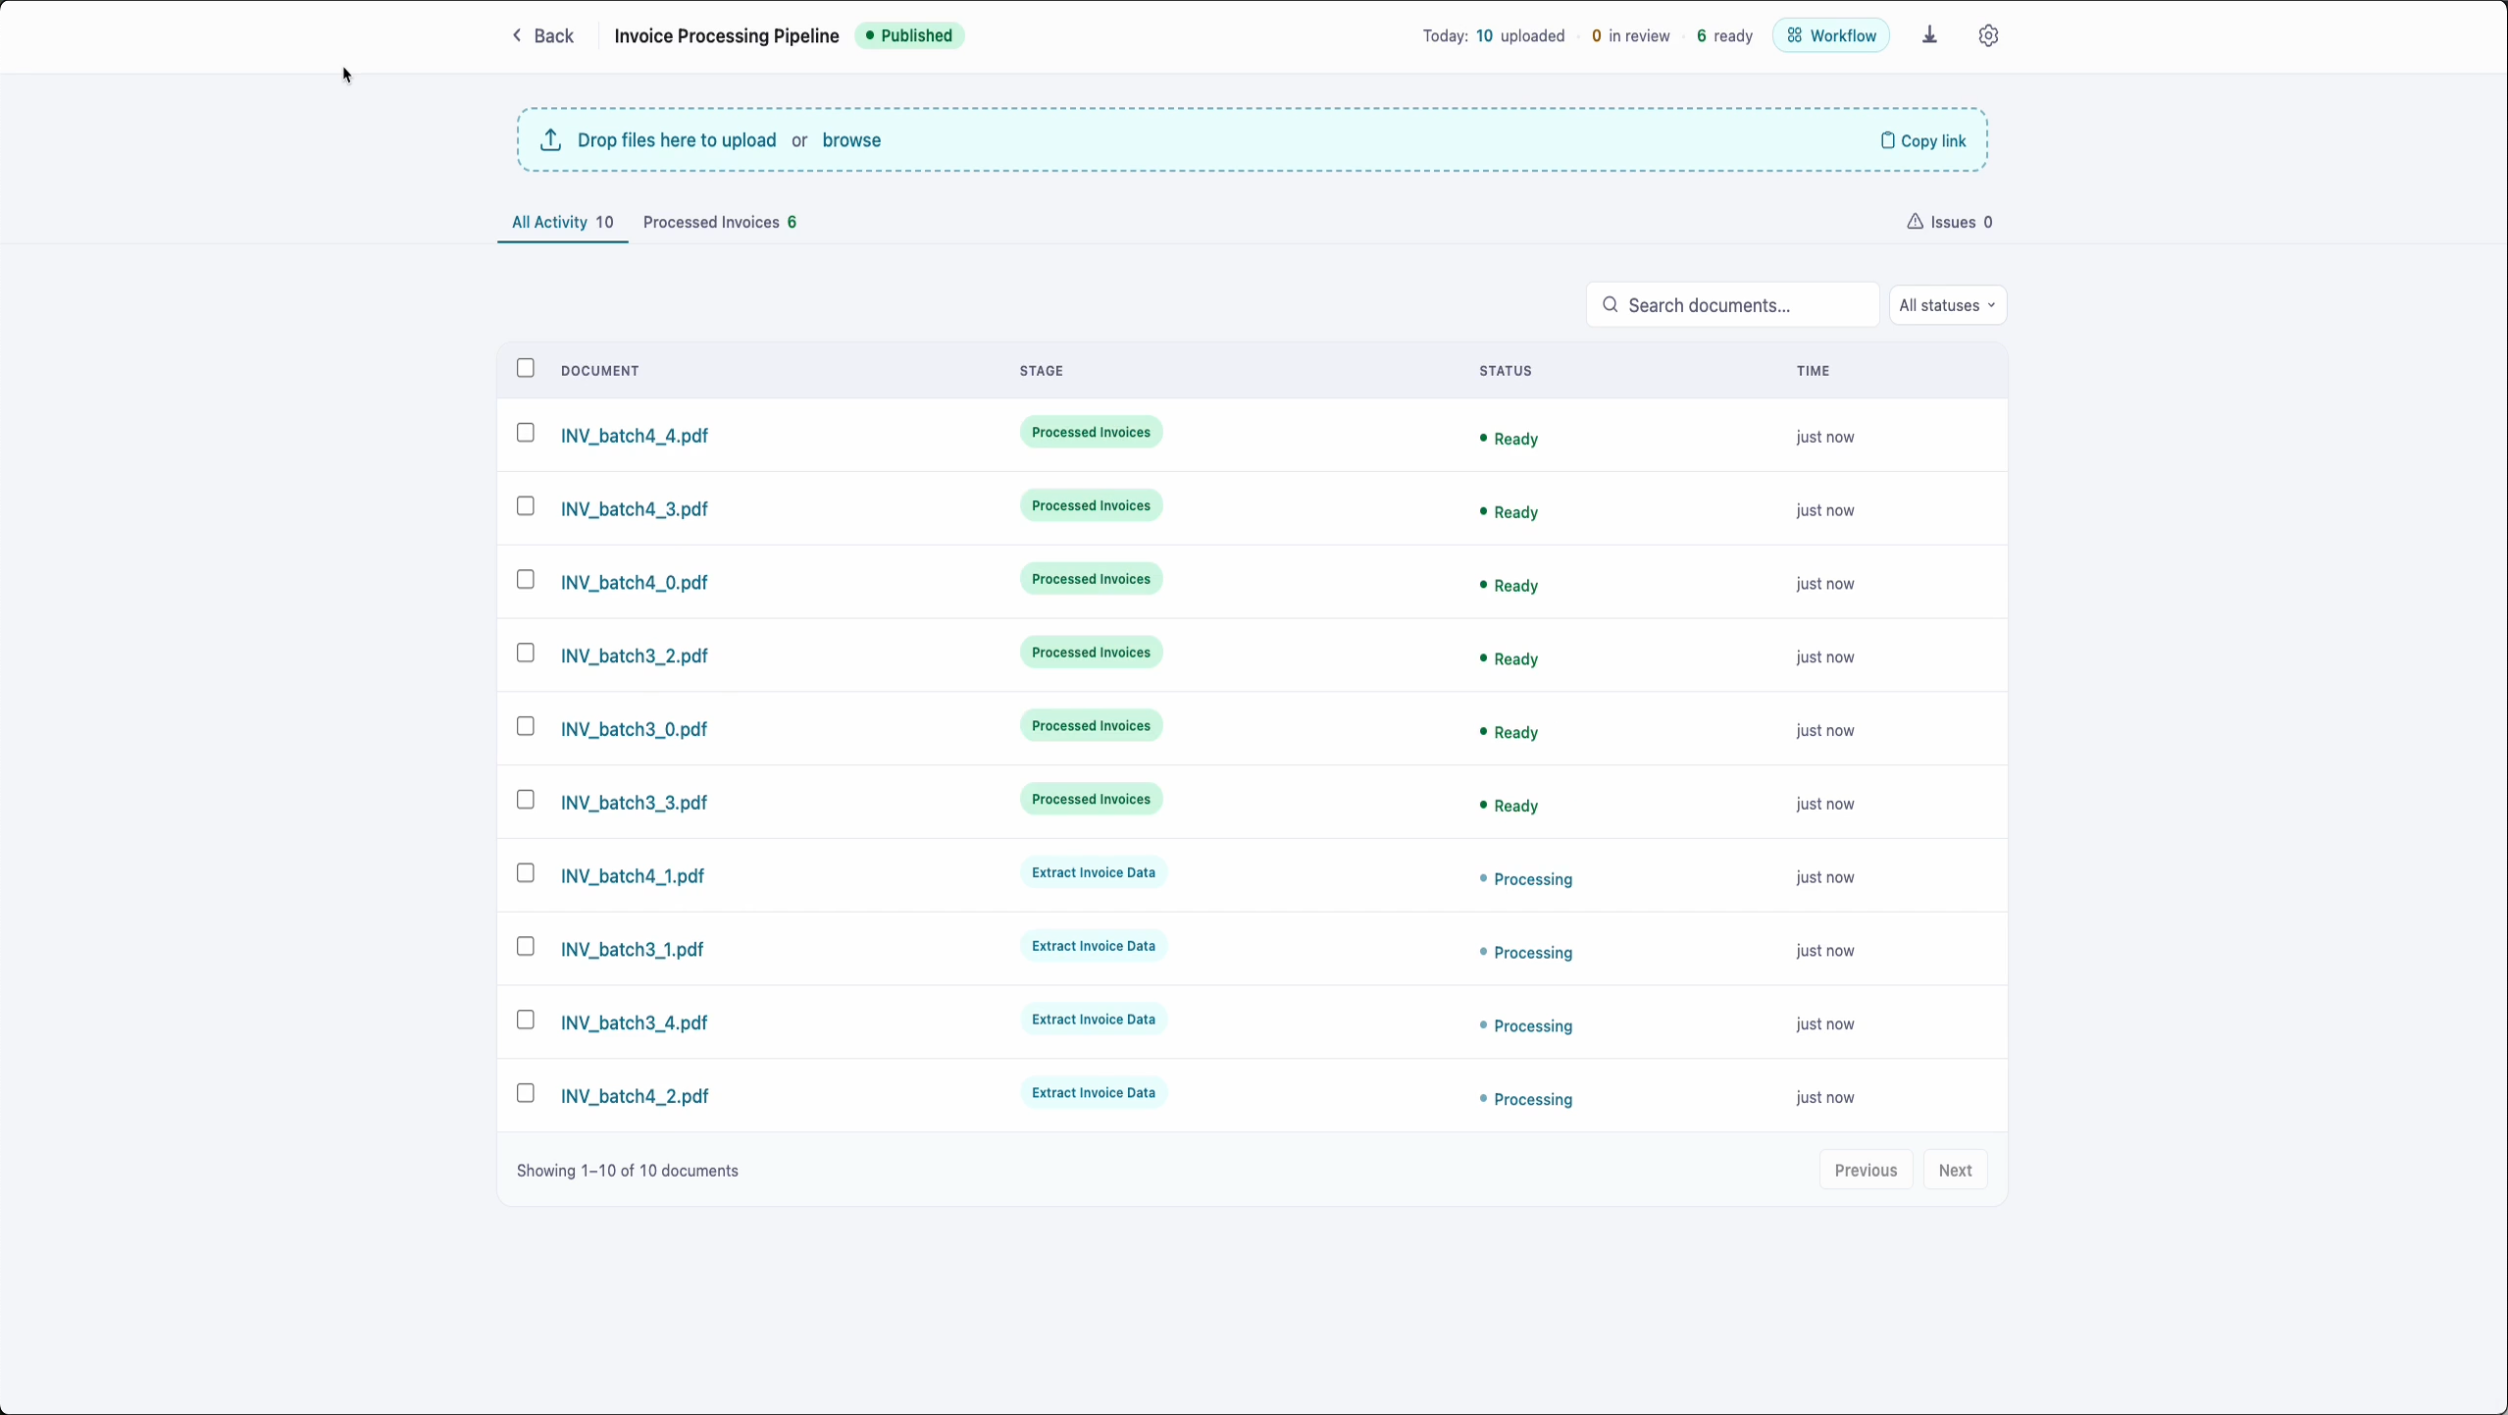
Fibula runs each document through the workflow you built. The agent reads it, extracts the fields you asked for, and stores the structured output.
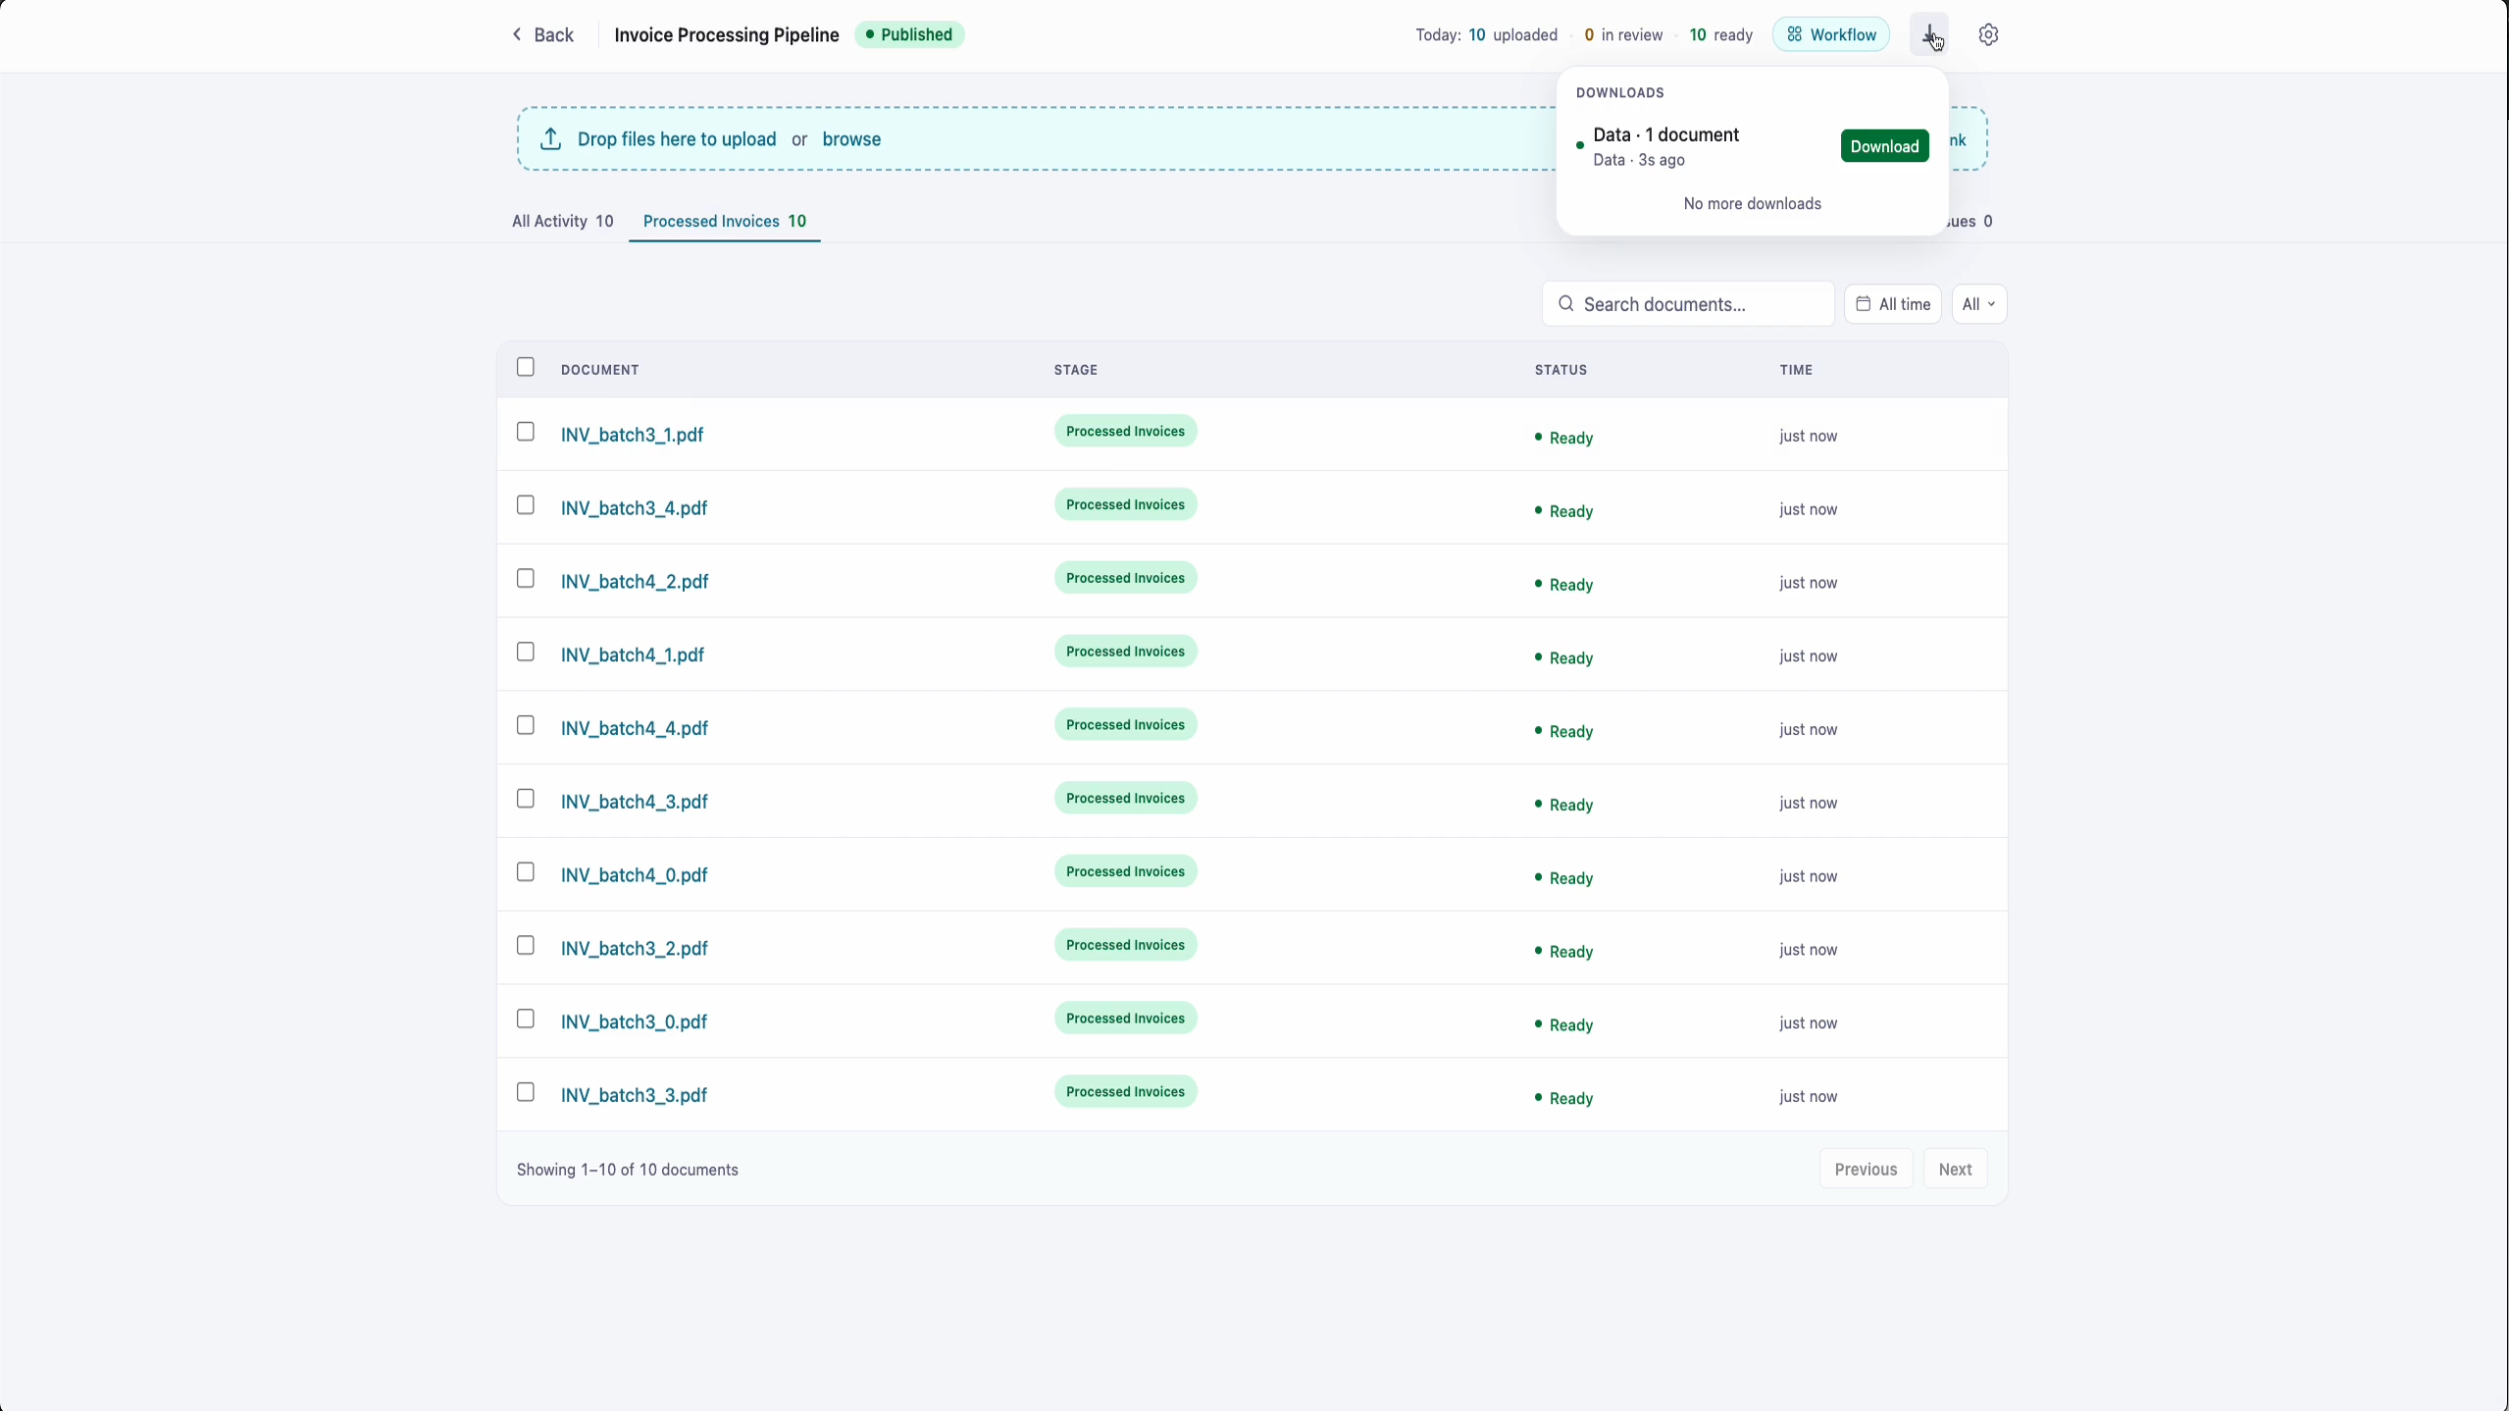
Download the structured data when ready, as CSV or however your workflow exports it.
What's next
Now that you have a working first workflow, the most common next moves are to wire the output somewhere automated:
- Send invoices to Xero. Forward an invoice, get a draft bill ready for approval a few seconds later.
- Export to a Google Sheet. One row per document, sortable, shareable with your team.
- Save originals to Google Drive. Keep a clean filing structure your auditor can navigate.
All of them follow the same pattern: connect once, then ask the agent.